

Chapter Overview
Course Progression
This chapter prepares for and reinforces Progressive Labs PL-04, PL-05, PL-06, and PL-08, where students preserve, correlate, reconstruct, and communicate endpoint and network evidence. Chapter Exercises 7.1 through 7.7 are the focused DFIR activities embedded in this chapter. Progressive Lab PL-07 is a separate threat-intelligence investigation and is not the lab for Chapter 7. See Course Progression and Progressive Lab Alignment in the front matter.
A Security Operations Center generates alerts. Threat hunters search for adversaries. Detection Engineers improve visibility. Eventually, one alert becomes real. A workstation is compromised. A server begins communicating with an attacker. Sensitive information may have been accessed. At this point, finding evidence is no longer enough. The organization must respond. Digital Forensics and Incident Response (DFIR) combines technical investigation with operational decision making.
Its purpose is to:
Preserve evidence
Understand attacker behavior
Contain the incident
Eradicate the threat
Recover operations
Prevent recurrence
Throughout this section students will investigate realistic incidents using Wazuh, Sysmon, Suricata, Windows event logs, packet captures, forensic artifacts, and timeline analysis.
Learning Objectives
After completing this chapter, you should be able to:
Explain Digital Forensics.
Explain Incident Response.
Differentiate forensic investigation from threat hunting.
Describe the Incident Response lifecycle.
Explain evidence preservation.
Identify common forensic artifacts.
Understand chain of custody.
Describe the role of the SOC during an incident.
7.1 Introduction to Digital Forensics and Incident Response
Introduction
Imagine arriving at work Monday morning.
The SOC dashboard shows:
A workstation executed encoded PowerShell. Suricata detected an outbound HTTP download. Windows Defender quarantined malware. The Wazuh correlation rule generated a Level 12 alert. Threat hunting confirmed suspicious behavior.
Now what?
The investigation has changed. The priority is no longer simply understanding the behavior. The priority becomes protecting the organization.
Threat Hunting versus Incident Response
Students frequently confuse these disciplines.
| Threat Hunting | Incident Response |
|---|---|
| Proactive | Reactive |
| Searches for unknown threats | Responds to suspected or confirmed incidents |
| Hypothesis-driven | Evidence-driven |
| Broad scope | Incident-focused |
| Improves detections | Restores operations |
Both disciplines frequently use the same telemetry. Their objectives differ.
Figure 7-1
Defensive Operations
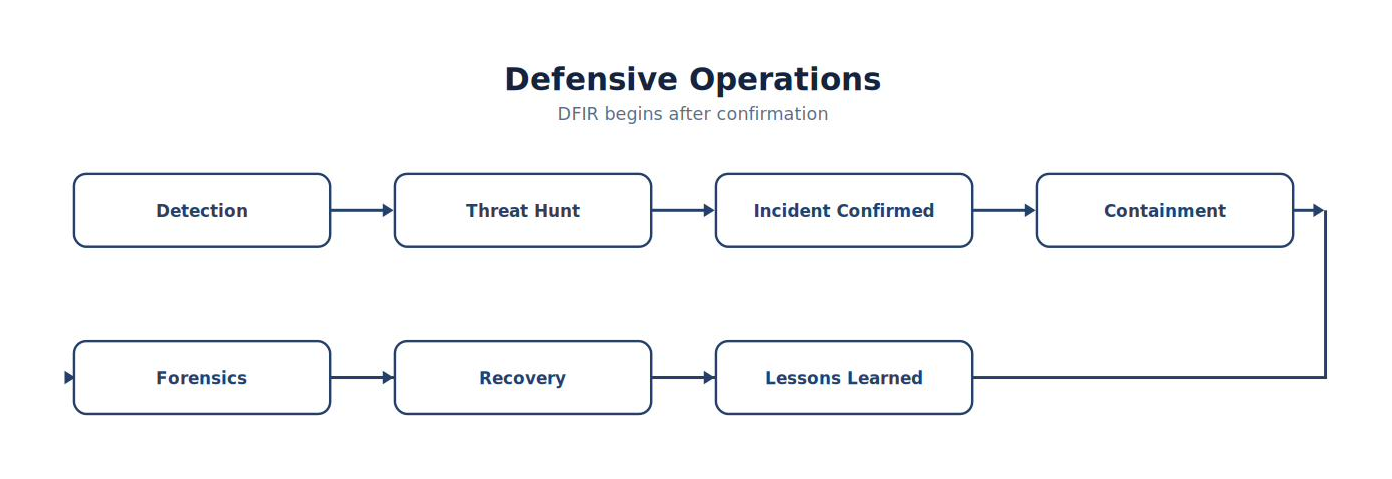
Note. The figure summarizes defensive Operations and highlights the relationships among its principal elements, evidence sources, and analytical outcomes.
Notice that the workflows overlap. Threat hunting may expose previously unknown activity; incident response begins when suspected or confirmed activity requires structured assessment, containment, or recovery.
What Is Digital Forensics?
Digital forensics applies scientific methods to identify, collect, examine, and analyze data while preserving its integrity and documenting how it was handled (Kent et al., 2006).
The objectives include:
Determining what occurred.
Identifying affected systems.
Establishing timelines.
Preserving evidence.
Supporting legal or regulatory requirements.
Improving future security.
Forensic investigations should be methodical, repeatable, and well documented.
What Is Incident Response?
Incident Response focuses on limiting organizational damage.
Typical goals include:
Stop the attack.
Preserve evidence.
Restore business operations.
Prevent recurrence.
Incident Response often operates under significant time pressure.
Analyst Tradecraft Tip
Forensics asks:
“What happened?”
Incident Response asks:
“What should we do right now?” Professional DFIR teams answer both questions simultaneously.
Why Evidence Matters
Suppose an analyst immediately powers off a compromised workstation.
What happened to:
Memory?
Running processes?
Network connections?
Encryption keys?
Much of that evidence may disappear. Good responders think about preserving evidence before taking irreversible actions.
Digital Evidence
Common sources include:
Memory
Disk images
Windows Event Logs
Sysmon logs
Wazuh alerts
Suricata events
Packet captures
Browser history
Registry artifacts
Scheduled tasks
Shell history
Authentication logs
Each source answers different investigative questions.
Figure 7-2
Sources of Evidence
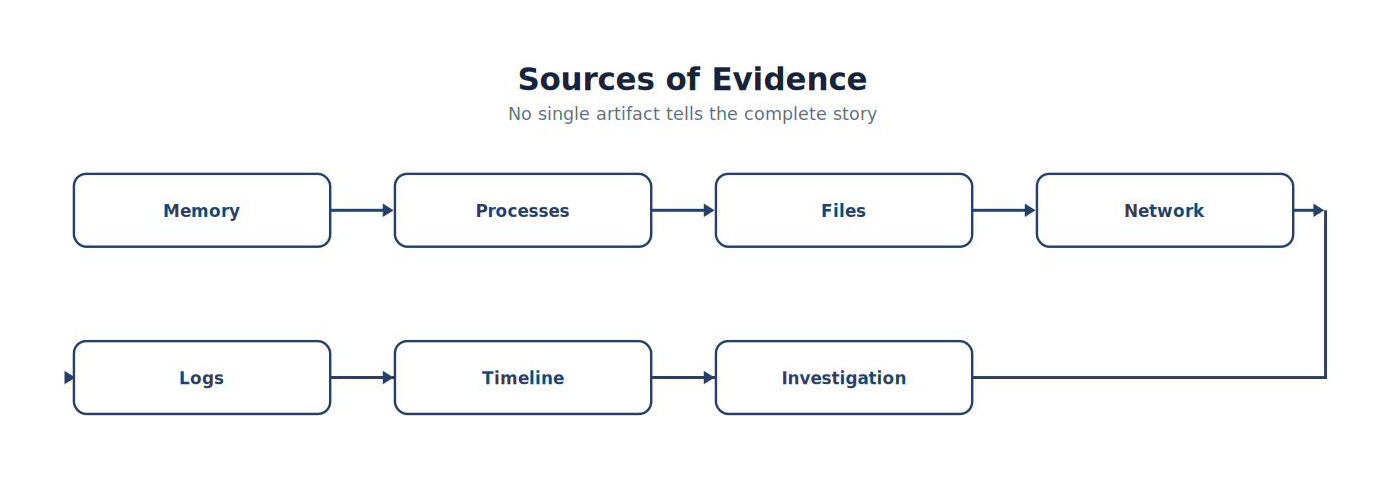
Note. The figure summarizes sources of Evidence and highlights the relationships among its principal elements, evidence sources, and analytical outcomes.
No single artifact tells the complete story.
Volatile vs Non-Volatile Evidence
Not all evidence lasts forever.
| Volatile Evidence | Non-Volatile Evidence |
|---|---|
| RAM | Hard drive |
| Running processes | Event logs |
| Network sessions | Registry hives |
| Open files | Configuration files |
| ARP cache | User profiles |
Volatile evidence disappears quickly. Collection order matters.
Order of Volatility
A common evidence collection priority is:
CPU registers and cache (specialized scenarios)
Memory (RAM)
Running processes and network connections
Temporary storage
Local disks
Archived or remote storage
The exact sequence depends on the incident, but responders should understand that some evidence disappears much faster than other evidence.
Chain of Custody
Evidence must be protected from accidental or intentional modification. Chain-of-custody documentation records possession and handling; it supports, but does not by itself establish, evidence integrity (Kent et al., 2006).
A chain of custody records:
Who collected the evidence.
When it was collected.
Where it was stored.
Who accessed it.
Why it was transferred.
Proper documentation helps preserve the integrity and credibility of the investigation.
Figure 7-3
Chain of Custody
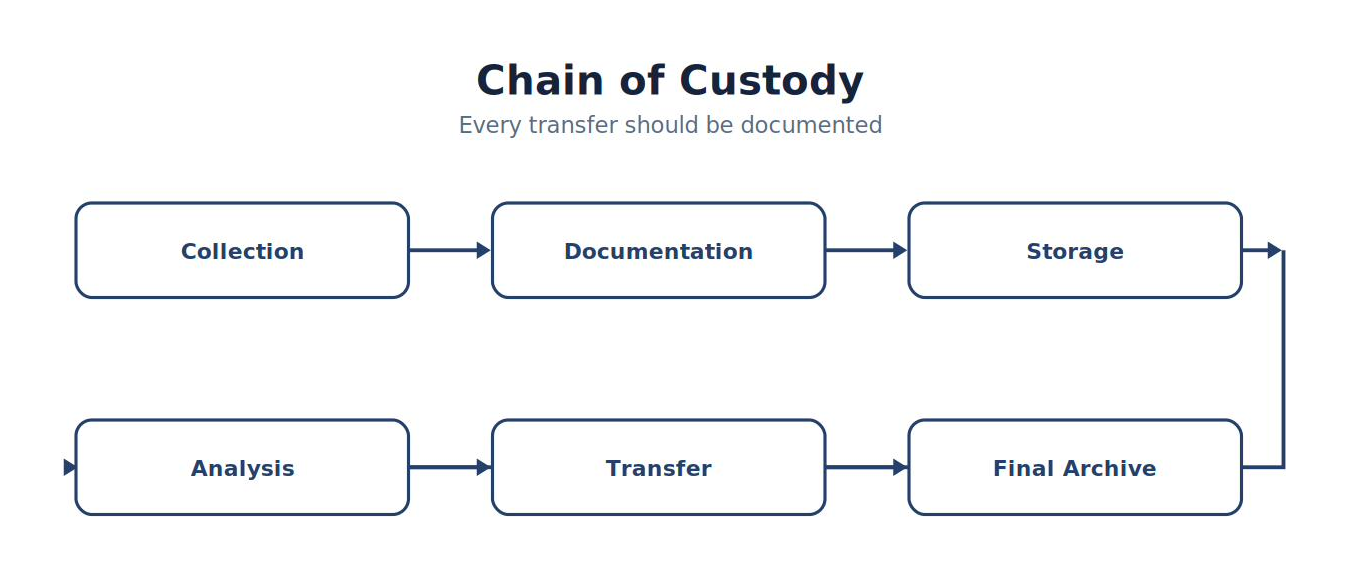
Note. The figure summarizes chain of Custody and highlights the relationships among its principal elements, evidence sources, and analytical outcomes.
Every transfer should be documented.
The Incident Response Lifecycle
Most organizations follow a structured response process.
Figure 7-4
Incident Response Lifecycle
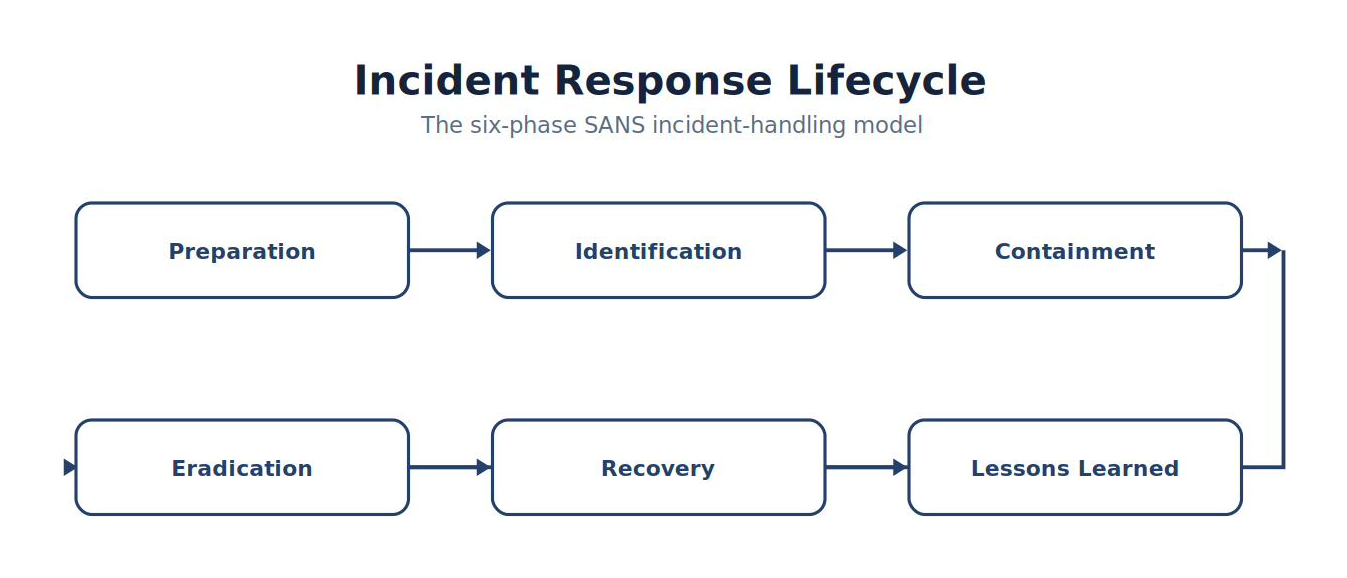
Note. The workflow presents the ordered stages of incident Response Lifecycle and highlights the validation and feedback steps that make the process repeatable.
This lifecycle provides a repeatable framework for responding to incidents. The six-phase model shown here derives from the SANS incident handler’s process (Kral, 2011); NIST’s current guidance, SP 800-61 Revision 3, reframes these same activities around the Cybersecurity Framework 2.0 functions (Nelson, Rekhi, et al., 2025).
Preparation
Preparation occurs before any incident.
Examples include:
Deploying Wazuh
Configuring Sysmon
Installing Suricata
Developing playbooks
Training analysts
Maintaining backups
Practicing tabletop exercises
Preparation often determines response success.
Identification
The SOC determines:
Is this truly an incident?
Evidence may include:
Wazuh alerts
Sysmon telemetry
Suricata detections
Defender events
Threat hunting findings
The goal is to confirm the incident.
Containment
Containment limits additional damage.
Possible actions include:
Isolating affected hosts
Blocking malicious IP addresses
Disabling compromised accounts
Restricting network access
Containment decisions should balance preserving evidence with reducing organizational risk.
Eradication
After containment, remove the threat.
Examples include:
Deleting malware
Closing exploited vulnerabilities
Removing persistence mechanisms
Resetting credentials
Updating detection rules
Eradication addresses the root cause.
Recovery
Recovery restores services and establishes confidence that systems can return to operation without reintroducing the incident (Bartock et al., 2016).
Examples include:
Rebuilding systems
Restoring backups
Monitoring for recurrence
Returning systems to production
Recovery should include validation, heightened monitoring, and defined decision criteria for returning systems to production. Restoration is not complete until the organization has reasonable confidence in the recovered system and its supporting controls.
Lessons Learned
Every incident should conclude with a review.
Questions include:
What happened?
What worked well?
What failed?
What telemetry was missing?
What detections should be improved?
Which playbooks require updates?
This final stage connects DFIR back to Detection Engineering and Threat Hunting.
Common Student Mistake
Students often believe that an incident ends when malware is removed.
Professional responders understand that:
Documentation remains.
Root cause analysis remains.
Detection improvements remain.
Playbook updates remain.
Management reporting remains.
Recovery is only one part of incident response.
Chapter Exercise 7.1 — Responding to Your First Security Incident
Objective
Respond to a simulated malware incident using the structured Incident Response lifecycle.
Scenario
A Windows 11 workstation generated:
Encoded PowerShell execution
DNS lookup
HTTP download
Suricata alert
Windows Defender quarantine
Wazuh Level 12 alert
Student Tasks
Confirm the incident.
Identify evidence sources.
Determine what evidence is volatile.
Recommend containment actions.
Identify eradication tasks.
Develop a recovery plan.
Recommend improvements to detections and playbooks.
Incident Response Worksheet
| Step | Completed |
|---|---|
| Incident Identified | □ |
| Evidence Preserved | □ |
| Volatile Evidence Considered | □ |
| Containment Plan | □ |
| Eradication Plan | □ |
| Recovery Plan | □ |
| Lessons Learned | □ |
Think Like an Incident Responder
Imagine two organizations experience the same compromise.
Organization A
Immediately shuts down the affected workstation, deletes the malware, rebuilds the system, and returns it to production. The attack appears to be gone.
However, the organization never determines:
How the attacker gained access.
Whether additional systems were compromised.
Whether credentials were stolen.
Whether persistence remains elsewhere.
Organization B
Follows a structured Incident Response process. Investigators preserve evidence, document every action, collect volatile data where appropriate, correlate endpoint and network telemetry, identify the root cause, validate containment, improve detections, and conduct a lessons-learned review before closing the incident. Both organizations recover. Only one emerges more secure than before the incident. That is the objective of professional Digital Forensics and Incident Response.
Key Concepts
By the end of this chapter, you should understand that:
Digital Forensics focuses on preserving and analyzing evidence, while Incident Response focuses on containing and recovering from security incidents.
Evidence preservation and documentation are foundational principles of DFIR.
Volatile evidence should be considered early in an investigation because it may disappear quickly.
The Incident Response lifecycle provides a repeatable framework for managing security incidents.
Every incident should conclude with lessons learned that improve Detection Engineering, Threat Hunting, and future response capabilities.
Looking Ahead
The next chapter, 7.2 Evidence Collection and Preservation, teaches students how to acquire digital evidence without unnecessarily altering it. They will learn how to collect memory, disk, log, and network artifacts; calculate and verify cryptographic hashes; document acquisition procedures; maintain chain of custody; and prepare evidence for forensic analysis. Rather than simply gathering files, students will learn how to collect defensible evidence suitable for technical investigations, internal reviews, regulatory requirements, and, where appropriate, legal proceedings. This chapter establishes the forensic discipline that underpins every successful DFIR investigation. A system administrator wants to restore operations as quickly as possible. A forensic investigator must preserve evidence while restoring operations. Those priorities occasionally conflict.
Throughout this chapter, one principle will be emphasized repeatedly:
Collect first. Analyze second. Change last. That philosophy protects the integrity of the investigation.
7.2 Evidence Collection and Preservation
Learning Objectives
After completing this chapter, you should be able to:
Explain why evidence preservation is critical.
Differentiate volatile and non-volatile evidence.
Follow a structured evidence collection methodology.
Verify evidence integrity using cryptographic hashes.
Maintain a defensible chain of custody.
Document evidence acquisition.
Prepare evidence for forensic analysis.
Introduction
Imagine arriving at an incident involving a compromised Windows workstation. The workstation is still powered on. Multiple users report suspicious behavior.
The temptation may be to immediately:
Shut it down.
Remove the malware.
Disconnect it from the network.
Unfortunately, those actions may permanently destroy valuable evidence. Professional investigators collect evidence before making unnecessary changes whenever practical and consistent with organizational priorities.
The Purpose of Evidence Collection
Evidence serves several purposes.
It allows investigators to:
Reconstruct events.
Determine attacker actions.
Identify affected systems.
Measure organizational impact.
Support legal or regulatory requirements.
Improve future detections.
Without evidence, investigators are forced to rely upon assumptions.
Figure 7-5
Evidence Lifecycle
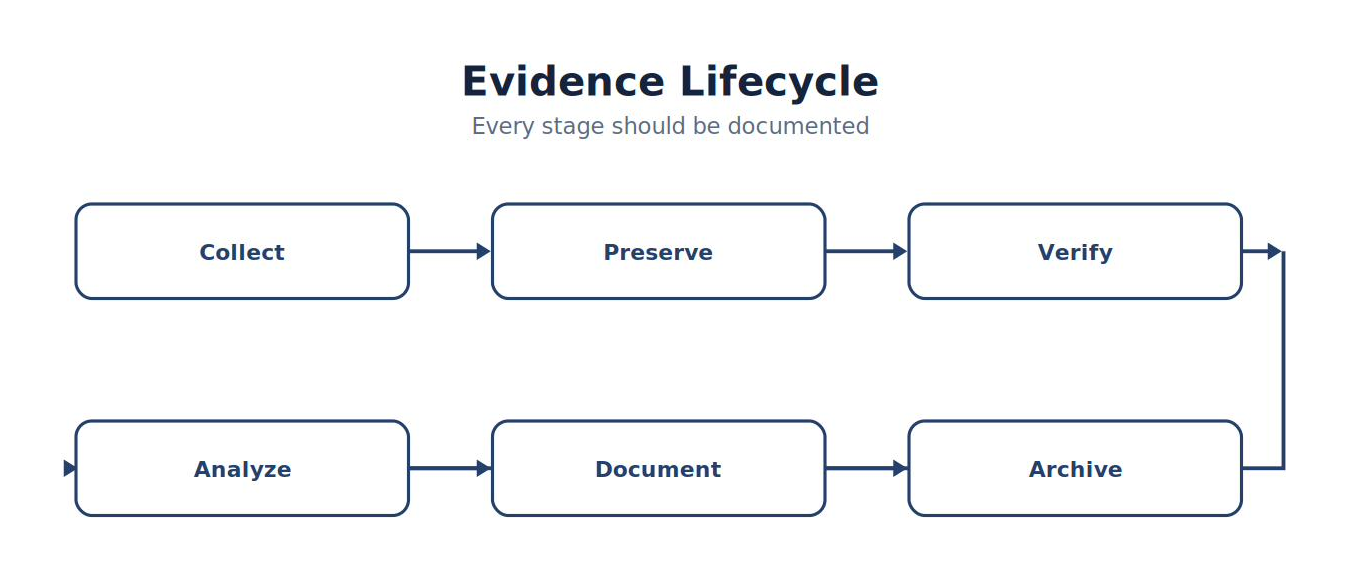
Note. The workflow presents the ordered stages of evidence Lifecycle and highlights the validation and feedback steps that make the process repeatable.
Every stage should be documented.
Fundamental Principles
Professional evidence collection follows several guiding principles (Kent et al., 2006).
Evidence should be:
Accurate
Complete
Repeatable
Verifiable
Well documented
Minimally altered
The investigator’s responsibility is to preserve the original state whenever possible.
Analyst Tradecraft Tip
One of the most common mistakes new investigators make is believing that collecting evidence is the same as analyzing evidence. It is not.
Collection answers:
What should we preserve?
Analysis answers:
What does it mean?
Never confuse the two phases.
Identifying Evidence Sources
Before collecting anything, identify potential evidence.
Examples include:
| Source | Example Evidence |
|---|---|
| Memory | Running processes |
| Disk | Malware files |
| Windows Logs | Authentication events |
| Sysmon | Process creation |
| Wazuh | Alerts |
| Suricata | Network events |
| Packet Captures | Communications |
| Browser Artifacts | Downloads |
| Registry | Persistence |
| Scheduled Tasks | Automation |
Each artifact answers different investigative questions.
Volatile Evidence
Volatile evidence changes rapidly.
Examples include:
RAM
Running processes
Network connections
Open files
Clipboard contents
Logged-in users
This evidence may disappear after shutdown or reboot.
Non-Volatile Evidence
Examples include:
Disk contents
Event logs
Registry hives
User profiles
Browser history
Configuration files
Although more persistent, non-volatile evidence may still change over time.
Figure 7-6
Evidence Priority
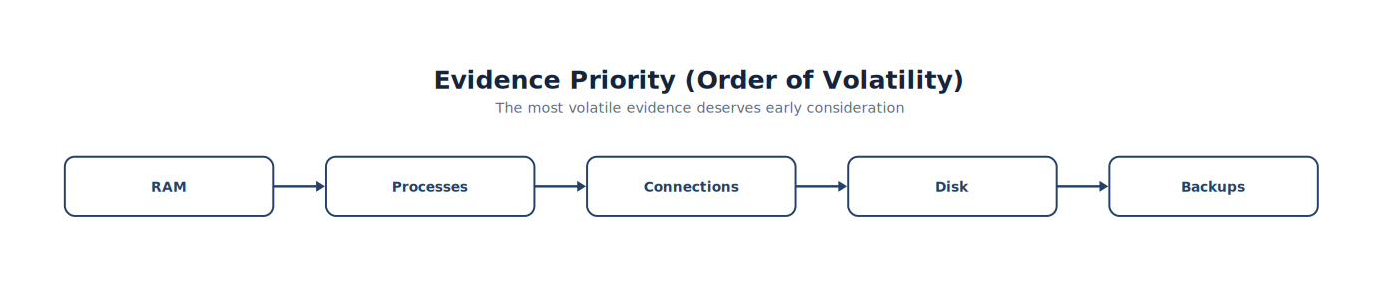
Note. The figure summarizes evidence Priority and highlights the relationships among its principal elements, evidence sources, and analytical outcomes.
Generally, the most volatile evidence deserves early consideration (Kent et al., 2006).
Developing an Evidence Collection Plan
Professional responders do not collect evidence randomly.
Instead they answer:
What happened?
What systems are involved?
What evidence may disappear?
What legal or organizational requirements apply?
What resources are available?
Planning reduces mistakes.
Cryptographic Hashes
After collecting evidence, verify its integrity. Hashing allows investigators to demonstrate that evidence has not changed during handling.
Common algorithms include:
| Algorithm | Typical Use |
|---|---|
| SHA-256 | Standard integrity verification |
| SHA-512 | High-assurance integrity verification |
| MD5 | Legacy compatibility (not recommended for new integrity workflows) |
Hash values should be recorded in the evidence log.
Figure 7-7
Integrity Verification
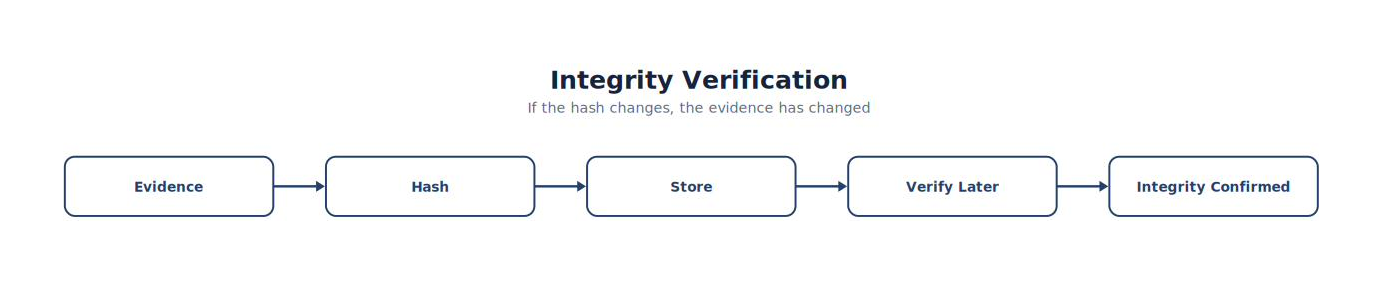
Note. The figure summarizes integrity Verification and highlights the relationships among its principal elements, evidence sources, and analytical outcomes.
Evidence Containers
Evidence should be stored in controlled locations.
Examples include:
Write-protected storage
Encrypted evidence repositories
Read-only forensic images
Secure evidence servers
Access should be restricted and documented.
Evidence Documentation
Every collection activity should record:
Date
Time
Investigator
System
Evidence type
Collection method
Hash value
Storage location
Documentation often becomes as important as the evidence itself.
Chain of Custody Form
Example:
| Field | Value |
|---|---|
| Case Number | 2026-001 |
| Investigator | Student Name |
| Date | __________ |
| Evidence ID | E-001 |
| Description | Windows Memory Image |
| Hash | __________________ |
| Storage | Evidence Locker |
Every transfer should be recorded.
Imaging Versus Copying
Students often confuse these terms. Copying transfers selected files and may omit deleted data, unallocated space, and filesystem metadata. Forensic imaging acquires a bit-stream or otherwise forensically sound representation of the target media with documented tools, settings, and integrity checks. Investigators should preserve the original and analyze a verified working copy whenever feasible (Kent et al., 2006).
Analyst Tradecraft Tip
If an investigator can avoid working directly on the original evidence, they generally should. Preserve the original. Analyze a verified copy.
Memory Collection
Memory may contain:
Running malware
Encryption keys
Network connections
Injected code
Credentials
Command history
If memory collection is part of the organization’s response procedures, it should occur as early as practical because its contents change continuously.
Log Preservation
SOC environments generate many valuable logs.
Examples include:
Wazuh alerts
Sysmon logs
Windows Security logs
Suricata eve.json
Firewall logs
Authentication logs
Logs should be exported or preserved according to organizational procedures before rotation or retention policies remove them.
Network Evidence
Network artifacts may include:
Packet captures
NetFlow/IPFIX (if available)
DNS logs
Proxy logs
Firewall logs
VPN logs
Combining network and endpoint evidence provides a more complete investigation (Kent et al., 2006).
Evidence Packaging
Every evidence package should contain:
Evidence identifier
Description
Hash values
Collection notes
Chain of custody documentation
Related screenshots (when appropriate)
Investigator notes
Consistency improves future analysis.
Common Student Mistake
Students often collect:
Only the suspicious file.
Professional investigators also collect:
The parent process.
Related logs.
Network activity.
User information.
Timeline evidence.
Supporting telemetry.
Context frequently matters more than the file itself.
Chapter Exercise 7.2 — Evidence Collection
Objective
Develop an evidence preservation plan for a simulated Windows malware incident.
Scenario
A Windows 11 workstation generated:
Sysmon Event ID 1
Sysmon Event ID 22
Suricata HTTP alert
Windows Defender detection
Wazuh Level 12 correlation alert
Student Tasks
Identify:
Volatile evidence.
Non-volatile evidence.
Collection priority.
Hash verification requirements.
Chain of custody documentation.
Evidence storage location.
Explain why each item is important to the investigation.
Evidence Collection Worksheet
| Evidence | Priority | Collected |
|---|---|---|
| Memory | High | □ |
| Running Processes | High | □ |
| Network Connections | High | □ |
| Sysmon Logs | Medium | □ |
| Wazuh Alerts | Medium | □ |
| Suricata Logs | Medium | □ |
| Windows Event Logs | Medium | □ |
| Browser Artifacts | Low | □ |
Students should justify any deviations from their proposed collection order.
Practical Considerations
Evidence collection does not occur in a vacuum.
Investigators must balance:
Business continuity
Safety
Legal obligations
Regulatory requirements
Operational impact
Preservation of evidence
The “perfect” forensic acquisition may not always be possible during an active incident. Professional responders document trade-offs and explain their decisions.
Think Like a Forensic Investigator
Imagine two organizations experience the same malware incident.
Organization A
Copies the suspicious executable to a USB drive, deletes it from the workstation, and closes the ticket.
Organization B
Documents the incident, identifies volatile evidence, preserves logs, records cryptographic hashes, maintains chain of custody, acquires the necessary forensic artifacts, analyzes verified copies, and preserves all documentation for future review. Both organizations removed the malware. Only one preserved enough evidence to confidently explain what happened, how it happened, and how to prevent it from happening again. That is the purpose of professional digital forensics.
Key Concepts
By the end of this chapter, you should understand that:
Evidence collection and evidence analysis are separate phases of a forensic investigation.
Investigators should consider the volatility of evidence when planning collection activities.
Cryptographic hashes help verify evidence integrity throughout its lifecycle.
Chain of custody documentation supports the integrity and traceability of evidence handling.
Collecting contextual artifacts—such as logs, timelines, and related telemetry—is often as important as collecting the suspected malicious file itself.
Well-planned evidence collection provides the foundation for accurate forensic analysis, effective incident response, and continuous improvement of the organization’s security program.
Looking Ahead
The next chapter, 7.3 Windows Forensic Artifacts, explores the rich collection of forensic evidence available on Windows systems. Students will learn how to investigate event logs, the Windows Registry, Prefetch files, Jump Lists, scheduled tasks, user profiles, browser artifacts, Sysmon telemetry, and other operating system artifacts to reconstruct user activity and attacker behavior. By correlating these artifacts with Wazuh, Suricata, and Windows Defender, students will begin building comprehensive forensic timelines that support both incident response and legal-quality investigations.
7.3 Windows Forensic Artifacts
This section teaches artifacts the way investigators actually use them.
Investigators don’t think:
“Let’s examine the Registry.”
They think:
“I need to answer a question.”
Examples include:
Did the user execute this program?
Was the malware persistent?
Was the file downloaded?
When did it execute?
Who launched it?
What happened immediately afterward?
Each question leads to one or more Windows artifacts.
Throughout this chapter we will reinforce one philosophy:
Artifacts answer questions. Timelines answer incidents.
Chapter Overview
Windows records thousands of forensic artifacts during normal operation. Most users never notice them. Investigators rely on them every day.
Artifacts help answer questions such as:
Which programs executed?
Which user logged in?
Which websites were visited?
Which files were opened?
Which USB devices were connected?
Which scheduled tasks existed?
Which registry keys changed?
No single artifact tells the entire story. Professional investigators correlate multiple artifacts to reconstruct events.
Learning Objectives
After completing this chapter, you should be able to:
Explain the purpose of Windows forensic artifacts.
Identify common Windows evidence sources.
Investigate application execution.
Analyze Windows Event Logs.
Investigate Registry artifacts.
Examine Prefetch files.
Analyze Jump Lists.
Investigate scheduled tasks.
Correlate artifacts using Wazuh and Sysmon.
Build forensic timelines.
Introduction
Imagine malware executes successfully. The executable deletes itself.
Does the investigation end?
No. Windows leaves behind numerous traces.
Examples include:
Event Logs
Registry updates
Prefetch entries
Jump Lists
Shellbags
Scheduled Tasks
Recent Files
Browser history
UserAssist
SRUM
Amcache
Shimcache (AppCompatCache)
The malware may disappear. Its artifacts often remain.
Figure 7-8
Windows Artifact Ecosystem
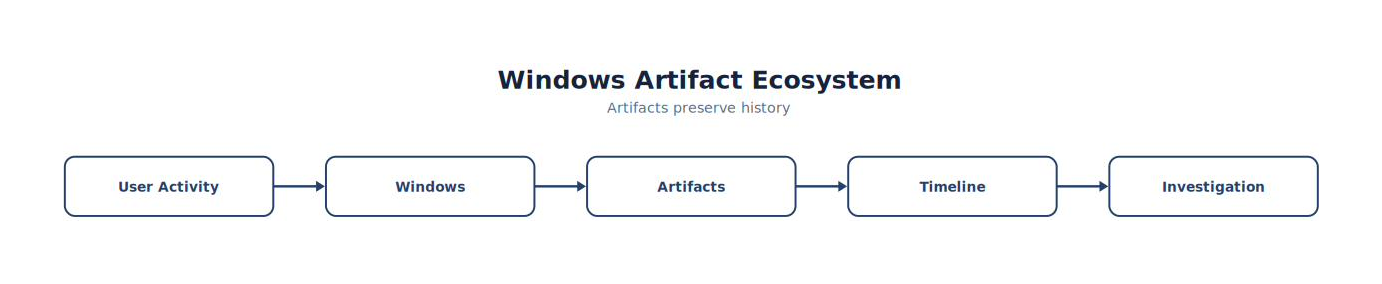
Note. The diagram identifies the primary components of windows Artifact Ecosystem and shows how they connect, exchange data, and support security operations.
Categories of Windows Artifacts
Windows artifacts generally fall into several categories.
| Category | Examples |
|---|---|
| Execution | Prefetch, UserAssist, Amcache |
| Persistence | Registry Run Keys, Services, Scheduled Tasks |
| Authentication | Security Event Logs |
| File Activity | Recent Files, Jump Lists |
| Network | Sysmon, Firewall Logs |
| User Activity | Shellbags, MRUs |
| Browser | History, Downloads, Cache |
| System | Registry, Event Logs |
Thinking in categories simplifies investigations.
Windows Event Logs
Windows Event Logs often provide the first evidence examined.
Common logs include:
| Log | Purpose |
|---|---|
| Security | Authentication and security events |
| System | Operating system events |
| Application | Application events |
| Sysmon | Enhanced endpoint telemetry |
| PowerShell | Script execution |
| Defender | Malware detections |
These logs frequently establish the initial investigation timeline.
Analyst Tradecraft Tip
Students often attempt to read Windows Event Logs sequentially. Professional investigators instead search for events related to their investigative questions. The question determines the log—not the other way around.
Sysmon
Throughout this textbook, Sysmon remains one of the most valuable forensic sources.
High-value events include:
| Event | Purpose |
|---|---|
| Event ID 1 | Process Creation |
| Event ID 3 | Network Connection |
| Event ID 8 | Remote Thread Creation |
| Event ID 11 | File Creation |
| Event ID 22 | DNS Query |
Combined, these events reconstruct much of attacker activity.
Windows Registry
The Registry stores configuration information for:
Windows
Applications
Users
Services
Startup locations
Investigators frequently examine Registry keys for persistence mechanisms.
Registry Run Keys
Attackers commonly establish persistence through Run keys.
Questions include:
Which programs execute at logon?
Was a new startup entry created?
Which account owns the entry?
Registry persistence should always be verified against expected administrative activity.
Figure 7-9
Registry Persistence
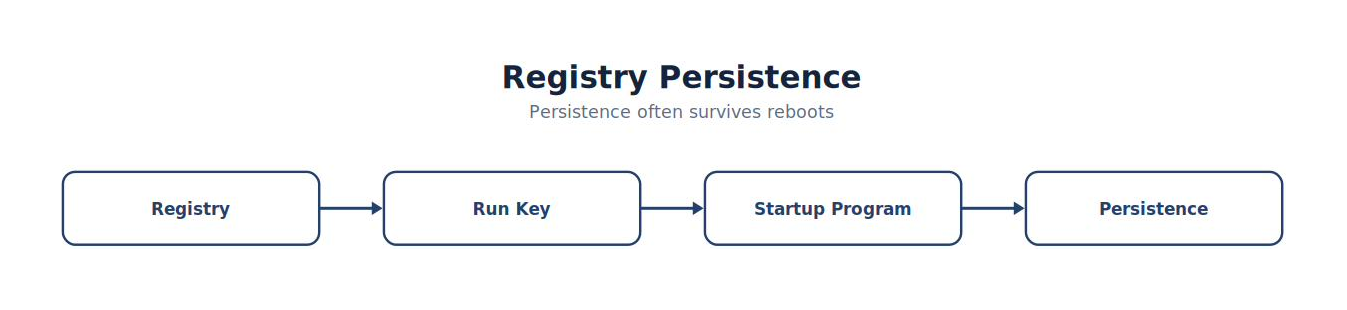
Note. The figure summarizes registry Persistence and highlights the relationships among its principal elements, evidence sources, and analytical outcomes.
Persistence often survives reboots.
Prefetch
Prefetch records application execution to improve performance.
For investigators, it answers questions such as:
Did this executable run?
Approximately when did it execute?
How many times has it executed?
Prefetch provides valuable evidence of program execution.
Amcache
Amcache maintains information about applications observed by the operating system.
Investigators may use it to answer questions including:
Was the application present on the system?
What metadata was recorded?
When was it first observed?
Amcache often complements Prefetch and other execution artifacts.
AppCompatCache (Shimcache)
The Application Compatibility Cache (Shimcache) may contain information about programs observed by Windows. It is useful for identifying programs that were present or processed by the operating system, but investigators should avoid assuming it proves successful execution without corroborating evidence from other artifacts. Good investigations correlate Shimcache with Prefetch, Amcache, Event Logs, or Sysmon.
UserAssist
UserAssist records information associated with programs launched through the Windows graphical interface.
It may help answer:
Which applications did the user launch?
Which account launched them?
How frequently were they used?
UserAssist provides user-focused execution evidence.
Jump Lists
Jump Lists record recently accessed files for many applications.
Example questions:
Which document was opened?
Which PDF was viewed?
Which executable was recently accessed?
Jump Lists frequently establish user intent.
Recent Files
Windows maintains lists of recently accessed files.
Questions:
Which documents were opened?
Which files were modified?
When?
Although simple, these artifacts often become important during investigations.
Shellbags
Shellbags preserve information about folders viewed through Windows Explorer.
Investigators may determine:
Which directories were accessed.
Whether removable media folders were browsed.
User navigation patterns.
Shellbags are valuable when files no longer exist.
Scheduled Tasks
Scheduled Tasks frequently provide persistence.
Questions include:
When was the task created?
Which account owns it?
Which executable launches?
Does the task appear legitimate?
Scheduled Tasks should always be correlated with Sysmon process creation.
Windows Defender
Windows Defender provides valuable forensic evidence.
Examples:
Malware detections
Quarantine actions
Scan history
Threat names
Detection timestamps
Defender frequently confirms malicious activity suggested by other artifacts.
Browser Artifacts
Modern investigations frequently involve browsers.
Artifacts include:
Browsing history
Downloads
Cookies
Cached content
Saved credentials (where applicable)
Session information
These artifacts help reconstruct user activity.
Correlating Artifacts
Professional investigations combine artifacts.
Example:
Figure 7-10
From Browser Download to Timeline
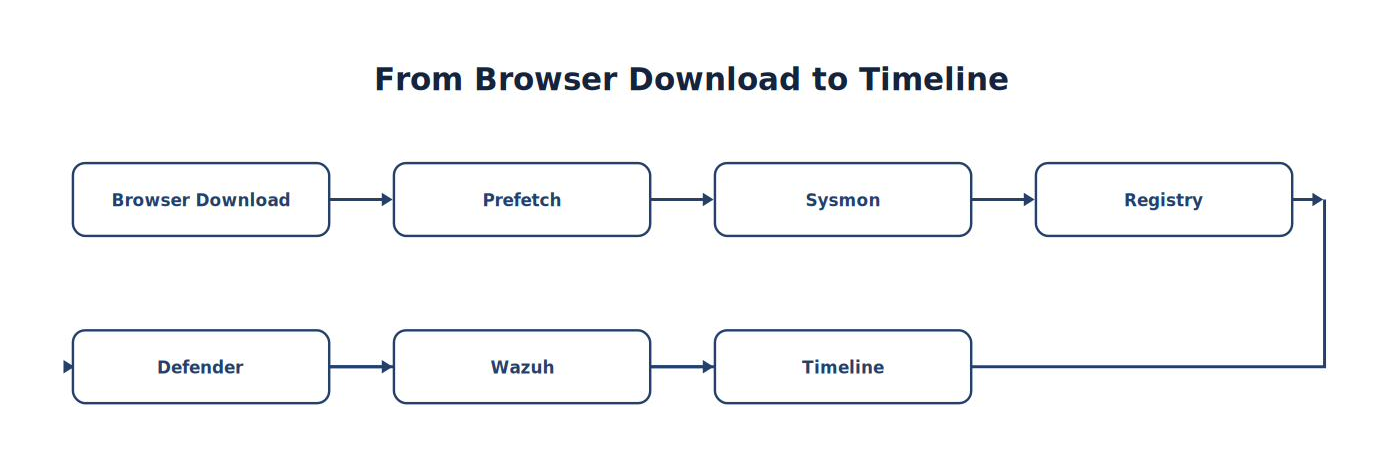
Note. The sequence traces how Browser Download progresses to Timeline, emphasizing the intermediate evidence and processing steps.
No artifact should be interpreted in isolation.
Building a Timeline
Rather than examining artifacts separately, construct a unified timeline.
| Time | Artifact | Evidence |
|---|---|---|
| 10:01 | Browser | Download |
| 10:02 | Prefetch | Program Execution |
| 10:03 | Sysmon | PowerShell |
| 10:04 | DNS | Lookup |
| 10:05 | Suricata | HTTP |
| 10:06 | Defender | Detection |
Timelines reveal causality.
Artifact Reliability
Not every artifact answers every question.
| Artifact | Strong For | Limitations |
|---|---|---|
| Sysmon | Process activity | Depends on configuration |
| Prefetch | Program execution history | Not present in every scenario |
| Registry Run Keys | Persistence | Only one persistence mechanism |
| Event Logs | Authentication and system events | Retention limits |
| Browser History | Web activity | Can be cleared by users or applications |
| Jump Lists | Recently accessed files | Application-dependent |
Investigators should corroborate findings across multiple artifacts.
Common Student Mistake
Students often believe that finding one artifact proves the entire case.
Professional investigators ask:
Which artifact supports this conclusion?
Which artifact contradicts it?
Which additional evidence should exist if my conclusion is correct?
Multiple independent artifacts strengthen confidence.
Chapter Exercise 7.3 — Windows Artifact Investigation
Objective
Reconstruct a simulated malware incident using Windows forensic artifacts.
Scenario
A Windows 11 workstation executed a suspicious PowerShell command, downloaded the EICAR test file, and generated a Wazuh alert (EICAR, n.d.).
Student Tasks
Using available artifacts:
Determine which user initiated the activity.
Identify whether the application executed.
Determine whether persistence was established.
Identify any downloaded files.
Review Sysmon telemetry.
Correlate Wazuh alerts.
Build a complete timeline.
Windows Artifact Worksheet
| Artifact | Reviewed |
|---|---|
| Security Event Logs | □ |
| Sysmon | □ |
| Registry | □ |
| Prefetch | □ |
| Amcache | □ |
| UserAssist | □ |
| Jump Lists | □ |
| Scheduled Tasks | □ |
| Browser Artifacts | □ |
| Windows Defender | □ |
| Timeline Completed | □ |
Students should document how each artifact contributed to the investigation.
Forensic Artifact Matrix
To help students decide which artifact answers which question, investigators can use the following matrix:
| Investigative Question | Primary Artifact(s) | Supporting Artifact(s) |
|---|---|---|
| Did a program execute? | Sysmon Event ID 1, Prefetch | Amcache, UserAssist |
| Who launched it? | Security Log, Sysmon | UserAssist |
| What command was used? | Sysmon | PowerShell Operational Log |
| Was persistence created? | Registry, Scheduled Tasks | Sysmon |
| Was a file downloaded? | Browser History, Sysmon | Defender, Suricata |
| Was malware detected? | Defender | Wazuh |
| Was there network communication? | Sysmon Event ID 3, Suricata | Firewall Logs |
| What happened first? | Timeline | All correlated artifacts |
This matrix encourages students to start with investigative questions instead of randomly browsing artifacts.
Think Like a Forensic Investigator
Imagine two investigators examine the same compromised workstation.
Investigator A
Finds the malware executable, deletes it, and concludes the investigation.
Investigator B
Examines Sysmon telemetry, Windows Event Logs, Prefetch, Amcache, Registry persistence, browser artifacts, scheduled tasks, Defender logs, Suricata alerts, and Wazuh correlations. They reconstruct a minute-by-minute timeline showing how the attacker gained execution, communicated over the network, established persistence, and triggered defensive controls. Both investigators removed the malware. Only one can explain what happened, how it happened, when it happened, who was involved, and what should be improved to prevent a recurrence. That is the difference between removing malware and conducting a forensic investigation.
Key Concepts
By the end of this chapter, you should understand that:
Windows records numerous forensic artifacts that help reconstruct user and attacker activity.
Different artifacts answer different investigative questions; no single artifact is sufficient on its own.
Sysmon, Event Logs, Prefetch, Amcache, UserAssist, Registry artifacts, browser artifacts, and scheduled tasks are among the highest-value Windows forensic evidence sources.
Reliable conclusions are built by correlating multiple independent artifacts into a unified timeline.
Effective forensic investigations begin with questions, use artifacts to answer those questions, and document conclusions supported by evidence.
Looking Ahead
The next chapter, 7.4 Memory Forensics and Live Response, introduces one of the most powerful—and challenging—areas of DFIR. Students will learn how to perform live response on active systems, understand when memory acquisition is appropriate, identify processes, network connections, injected code, and other volatile artifacts, and appreciate both the value and the limitations of memory analysis. By integrating memory evidence with Sysmon, Wazuh, Suricata, and Windows forensic artifacts, students will complete the transition from artifact-based investigation to comprehensive enterprise incident reconstruction.
7.4 Memory Forensics and Live Response
Reality is different. Memory analysis is valuable because it captures information that may never be written to disk.
One phrase I want students to remember throughout this chapter is:
When the system powers off, memory disappears. That simple fact explains why RAM is one of the most valuable—and time-sensitive—sources of digital evidence.
Chapter Overview
Many attacks exist only in memory.
Examples include:
Injected code
Running malware
Encryption keys
Network connections
Active processes
In-memory credentials
PowerShell sessions
If investigators wait too long, this evidence may disappear permanently. Memory forensics allows investigators to preserve volatile evidence before it is lost.
Learning Objectives
After completing this chapter, you should be able to:
Explain the importance of volatile evidence.
Describe live response procedures.
Explain when memory acquisition is appropriate.
Identify valuable memory artifacts.
Investigate running processes.
Examine network connections.
Correlate memory findings with Wazuh and Sysmon.
Build timelines using live evidence.
Introduction
Suppose ransomware executes. The malware never writes itself to disk. Instead, it exists only in RAM. The workstation remains powered on.
What happens if an investigator immediately shuts it down?
Every running process disappears. Every network connection closes. Every encryption key is lost. The evidence may never be recovered. Memory acquisition exists to preserve that information.
Figure 7-11
Volatile Evidence
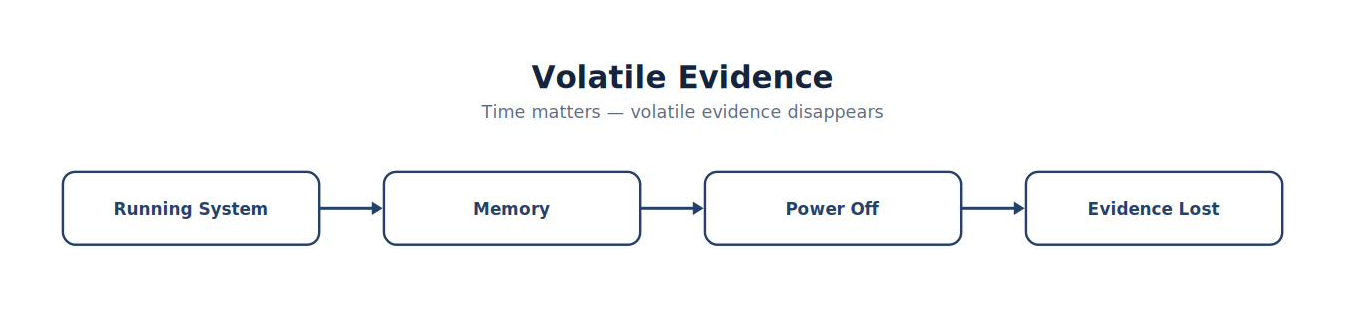
Note. The figure summarizes volatile Evidence and highlights the relationships among its principal elements, evidence sources, and analytical outcomes.
What Is Live Response?
Live response refers to collecting evidence from an actively running system (Nelson, Phillips, et al., 2025).
Examples include:
Running processes
Logged-in users
Network connections
Memory
Scheduled tasks
Services
Open files
Unlike traditional forensic imaging, live response interacts with an operational system.
Analyst Tradecraft Tip
Live response always changes the system to some degree. The objective is not to avoid all changes—that is impossible. The objective is to make necessary, documented, and minimal changes while preserving as much valuable evidence as practical.
Why Memory Matters
Memory may contain:
Running malware
PowerShell commands
Injected DLLs
Decrypted content
Encryption keys
Network sessions
Authentication tokens
Clipboard contents
Unsaved documents
Many of these artifacts never exist on disk.
Memory Acquisition
Organizations should establish approved procedures and tools for acquiring memory from live systems.
The general workflow is:
Confirm the need for live acquisition.
Document the system state.
Acquire memory using an approved acquisition tool.
Record cryptographic hashes of the acquired image.
Secure the evidence for analysis.
Always follow organizational policies and legal requirements when collecting live evidence.
A Practical Example — WinPmem
WinPmem, maintained by Velocidex, is a free, actively maintained, open-source memory acquisition tool for Windows. From an elevated (administrator) command prompt on the Windows 11 endpoint:
WIN11 · PowerShell (Administrator)
winpmem_mini_x64.exe -o C:\Evidence\WIN11_memory.aff4 -ddThe -o flag specifies the output file. WinPmem defaults to the AFF4 format — an open, self-documenting forensic container (as opposed to a raw .dmp file) that bundles the memory image together with acquisition metadata in a single evidence package. The -dd flag increases verbosity so you can watch the acquisition progress in real time.
Immediately after acquisition, compute and record a cryptographic hash of the resulting file — this is what makes the image legally defensible evidence rather than just a file on disk:
WIN11 · PowerShell (Administrator)
Get-FileHash C:\Evidence\WIN11_memory.aff4 -Algorithm SHA256Record that hash value in your investigation notes before the image ever leaves the machine it was acquired on. If the hash you compute during analysis ever fails to match this recorded value, the integrity of the evidence is in question.
Best Practice
Never acquire memory directly onto the same disk you are investigating—write the image to an external drive or a network share (Nelson, Phillips, et al., 2025). Writing evidence onto the very system under investigation risks overwriting other volatile or slack-space evidence you have not yet examined.
Live Response Checklist
Before collecting memory:
Record the system time.
Record the hostname.
Record logged-in users.
Record the investigator.
Record the reason for collection.
Document every action performed.
Documentation is part of the evidence.
Running Processes
Running processes often reveal active attacker behavior.
Questions include:
Which processes are executing?
Which user owns each process?
Which process launched it?
Which command line was used?
Which processes appear unusual?
Processes should be correlated with Sysmon Event ID 1 whenever possible.
Figure 7-12
Process Investigation
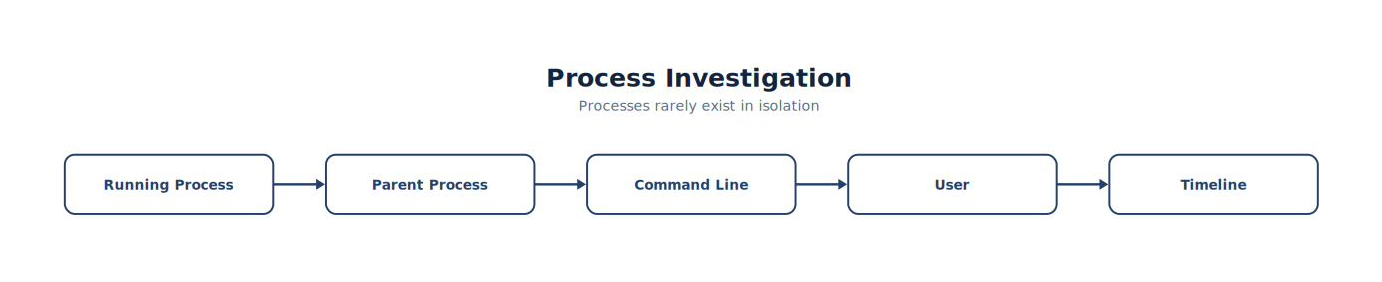
Note. The figure summarizes process Investigation and highlights the relationships among its principal elements, evidence sources, and analytical outcomes.
Processes rarely exist in isolation.
Network Connections
Live response also captures active communications.
Questions include:
Which remote systems are connected?
Which ports are open?
Which processes own each connection?
Are encrypted sessions active?
Do connections match Suricata observations?
Network evidence frequently complements memory evidence.
Logged-On Users
Investigators should determine:
Who is currently logged on?
Are multiple sessions active?
Are administrative accounts present?
Do active sessions match expected activity?
Identity provides valuable investigative context.
Services
Attackers often create or modify services.
Questions include:
Which services are running?
Which recently started?
Which execute from unusual locations?
Which accounts own them?
Services may represent persistence.
Scheduled Tasks
During live response, verify:
Newly created tasks
Unusual execution times
Unexpected accounts
Suspicious command lines
Scheduled Tasks often survive reboots.
Open Files
Open files may indicate:
Active ransomware
Data staging
Exfiltration
Temporary malware
Investigators should document significant findings before containment changes system state.
Correlating Memory with Sysmon
Suppose memory shows:
PowerShell
Sysmon confirms:
Event ID 1
Memory shows:
Network connection
Sysmon confirms:
Event ID 3
Suricata confirms:
HTTP session
Together, these sources reinforce the investigation.
Figure 7-13
Live Correlation
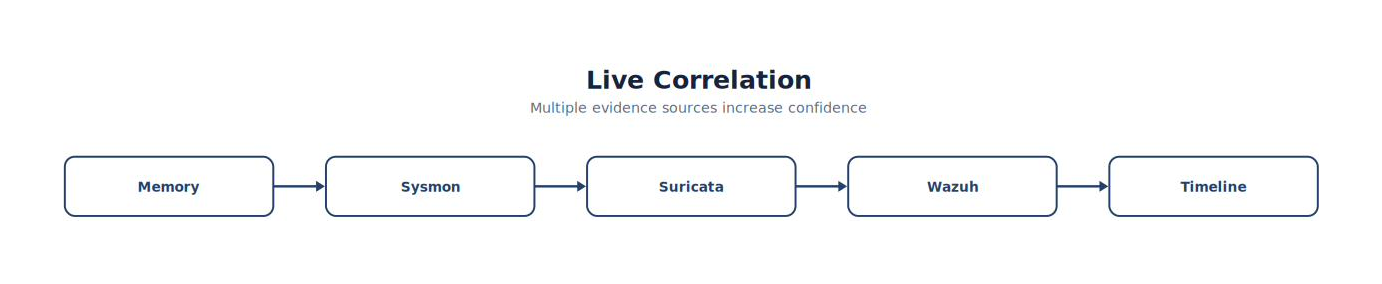
Note. The figure summarizes live Correlation and highlights the relationships among its principal elements, evidence sources, and analytical outcomes.
Multiple evidence sources increase confidence.
Live Response Timeline
Example:
| Time | Evidence | Source |
|---|---|---|
| 10:01 | PowerShell running | Memory |
| 10:01 | Process Creation | Sysmon |
| 10:02 | DNS Query | Sysmon |
| 10:03 | HTTP Session | Suricata |
| 10:04 | Malware Detection | Defender |
| 10:05 | Correlation Alert | Wazuh |
Memory fills important gaps.
Limitations of Memory Analysis
Memory forensics is powerful, but it has limitations.
Examples include:
RAM changes continuously.
Collection affects the running system.
Some artifacts disappear quickly.
Large memory images require significant storage.
Analysis can be time-consuming.
Investigators should understand both the strengths and limitations of volatile evidence.
Safety Considerations
Before performing live response:
Obtain authorization.
Consider business impact.
Coordinate with incident response leadership.
Preserve documentation.
Avoid unnecessary actions.
Technical capability should always be balanced with organizational procedures.
Common Student Mistake
Students often assume memory collection is required during every incident.
Professional responders evaluate:
Is the system still running?
Is volatile evidence likely to be valuable?
Will collection interfere with critical business operations?
Do organizational policies require or permit memory acquisition?
Memory acquisition is an important tool—not an automatic first step in every investigation.
Chapter Exercise 7.4 — Live Response Investigation
Objective
Develop a live response plan for an active Windows incident.
Scenario
A Windows 11 workstation is currently powered on.
Evidence includes:
Active PowerShell process
Suspicious outbound HTTPS connection
Wazuh Level 12 alert
Suricata HTTP metadata
Windows Defender malware detection
Student Tasks
Develop a response plan that includes:
Initial documentation.
Volatile evidence to collect.
Running process review.
Network connection review.
User session review.
Service review.
Correlation with Sysmon.
Timeline construction.
Students should explain why each step is performed.
Live Response Worksheet
| Item | Completed |
|---|---|
| System Information Recorded | □ |
| Time Synchronized | □ |
| Logged-On Users Documented | □ |
| Running Processes Reviewed | □ |
| Network Connections Recorded | □ |
| Services Reviewed | □ |
| Scheduled Tasks Reviewed | □ |
| Memory Acquisition Planned | □ |
| Sysmon Correlated | □ |
| Timeline Completed | □ |
Live Response Decision Matrix
Investigators frequently need to decide whether to collect volatile evidence before containment. The following matrix helps structure that decision.
| Situation | Live Response Recommended? | Rationale |
|---|---|---|
| System is powered on with active suspicious processes | Yes | Valuable volatile evidence may be available. |
| Malware has already been removed and the system rebooted | Limited | Most volatile evidence has already been lost. |
| Critical production server supporting patient care or emergency services | Case-by-case | Coordinate with operations leadership to balance evidence preservation and service availability. |
| Laboratory exercise | Yes | Excellent opportunity to practice procedures and documentation. |
Students should understand that technical decisions are often influenced by operational requirements.
Think Like a DFIR Investigator
Imagine two responders arrive at an active incident.
Responder A
Immediately disconnects power, removes the hard drive, and begins imaging it.
Responder B
Documents the scene, evaluates whether volatile evidence is important, records the current system state, coordinates with the incident response team, preserves appropriate live evidence, then proceeds with containment according to the organization’s procedures. Both responders collected evidence. Only one followed a structured methodology that balanced evidence preservation, operational needs, and investigative integrity. Professional DFIR work is not about collecting the most evidence. It is about collecting the right evidence at the right time, documenting every decision, and ensuring that conclusions are supported by verifiable facts.
Key Concepts
By the end of this chapter, you should understand that:
Memory contains valuable volatile evidence that may never be written to persistent storage.
Live response focuses on documenting and collecting information from running systems before it is lost.
Running processes, network connections, logged-on users, services, and scheduled tasks provide important investigative context.
Memory evidence should be correlated with Sysmon, Suricata, Windows Defender, and Wazuh to build a comprehensive incident timeline.
Live response activities should be carefully planned, documented, and performed in accordance with organizational policies and operational priorities.
Looking Ahead
The next chapter, 7.5 Network Forensics and Packet Analysis, expands the investigation beyond the endpoint. Students will learn how to use packet captures, Suricata metadata, Zeek logs (where available), DNS records, HTTP transactions, TLS metadata, and network flows to reconstruct attacker communications, identify lateral movement, detect data exfiltration, and validate endpoint findings. By integrating endpoint forensics with network forensics, students will complete one of the most important skills in enterprise DFIR: reconstructing an incident from multiple independent sources of evidence rather than relying on any single artifact or technology.
7.5 Network Forensics and Packet Analysis
One concept I want students to remember throughout this chapter is:
Endpoints tell you what a host did. Packets tell you what the host said. Neither perspective alone is sufficient for a complete investigation.
Chapter Overview
Attackers almost always communicate. Whether downloading malware, contacting command-and-control servers, moving laterally, or stealing data, their actions generate network traffic. Unlike endpoint artifacts, network evidence often captures interactions between multiple systems. Network forensics reconstructs those communications.
This chapter teaches students how to analyze packet captures, Suricata metadata, flow records, DNS activity, HTTP transactions, TLS sessions, and other network artifacts to reconstruct attacker behavior.
Learning Objectives
After completing this chapter, you should be able to:
Explain network forensics.
Describe packet capture fundamentals.
Analyze network conversations.
Investigate DNS activity.
Analyze HTTP traffic.
Interpret TLS metadata.
Correlate Suricata, Wazuh, and Sysmon evidence.
Build network timelines.
Identify common attacker behaviors.
Introduction
Imagine investigators recover a compromised workstation. Unfortunately, the attacker removed every malicious file. Memory was never collected.
Can investigators still learn what happened?
Often, yes. Because the attacker communicated across the network.
Those communications frequently reveal:
Initial downloads
Command-and-control
Lateral movement
Data exfiltration
Internal reconnaissance
Packets become witnesses.
Figure 7-14
Network Evidence
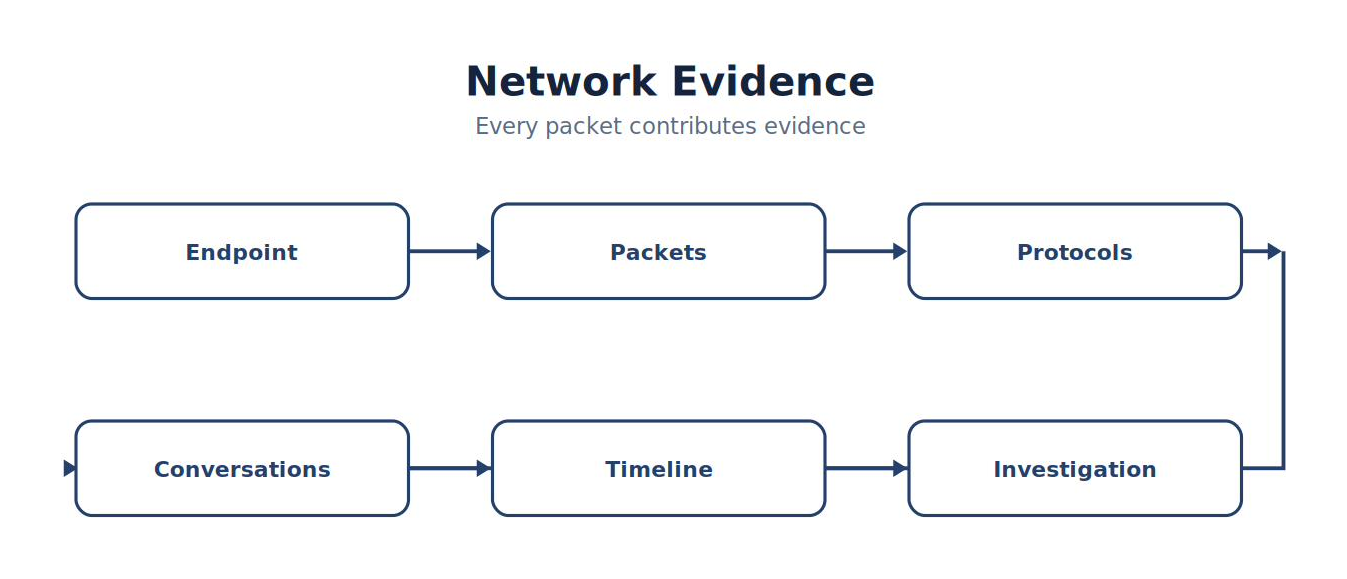
Note. The figure summarizes network Evidence and highlights the relationships among its principal elements, evidence sources, and analytical outcomes.
Every packet contributes evidence.
What Is Network Forensics?
Network forensics involves collecting, preserving, analyzing, and interpreting network communications to reconstruct events. Unlike endpoint investigations, network investigations examine interactions between systems.
Questions include:
Who communicated?
When?
Using which protocol?
What direction?
How frequently?
How much data?
Network Evidence Sources
Modern SOCs collect multiple forms of network evidence.
| Evidence | Description |
|---|---|
| Packet Captures (PCAP) | Complete packet contents |
| Suricata | IDS alerts and metadata |
| Zeek | Protocol metadata and logs |
| Firewall Logs | Connection records |
| DNS Logs | Name resolution activity |
| Proxy Logs | Web requests |
| VPN Logs | Remote access |
| NetFlow/IPFIX | Network flow summaries |
Each provides a different perspective.
Network evidence also has provenance. Investigators should document where the sensor was positioned, what interface and network segment it observed, when collection started and stopped, whether a capture filter was applied, and how the collection system synchronized time. These details define what the evidence can support. For example, a clean PCAP from one network segment cannot prove that no communication occurred through another interface or before collection began. Preserving the original capture, recording its cryptographic hash, and analyzing a verified working copy protect both integrity and repeatability (Kent et al., 2006; Rich, 2026).
Analyst Tradecraft Tip
Students often believe packet captures are always necessary. In reality, many investigations begin with metadata. Metadata is smaller, easier to search, and often answers the investigative question without examining every packet. Packets become necessary when metadata cannot answer the question.
Packet Capture Fundamentals
A packet capture records network traffic observed at a particular point.
Each packet contains:
Source
Destination
Protocol
Timing
Payload (when visible)
Packets reconstruct conversations.
The Five-Tuple
Network conversations are commonly identified by five values.
| Field | Description |
|---|---|
| Source IP | Sender |
| Destination IP | Receiver |
| Source Port | Sender Port |
| Destination Port | Receiver Port |
| Protocol | TCP, UDP, ICMP |
These values uniquely identify most communications.
Figure 7-15
Network Conversation
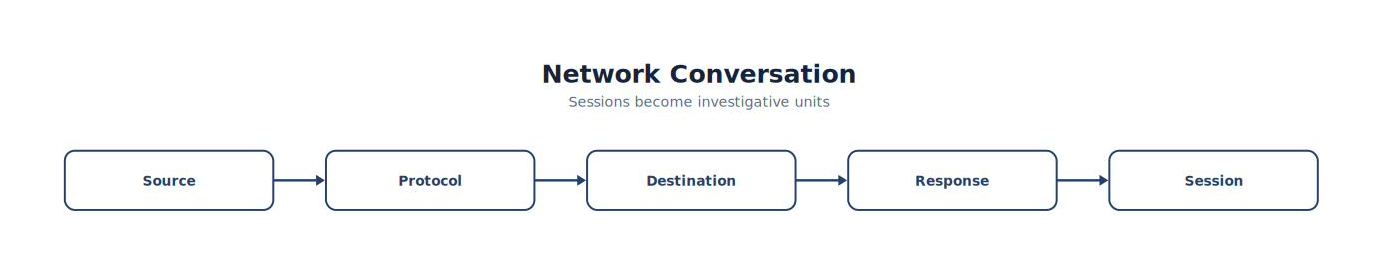
Note. The figure summarizes network Conversation and highlights the relationships among its principal elements, evidence sources, and analytical outcomes.
Sessions become investigative units.
DNS Analysis
Nearly every modern investigation includes DNS.
Questions include:
Which domains were queried?
Which hosts performed the lookup?
Which processes initiated the request?
Which domains appear unusual?
Which domains were queried immediately before downloads?
DNS frequently reveals attacker infrastructure.
HTTP Analysis
HTTP often reveals:
Downloads
Uploads
User-Agents
URLs
File transfers
Investigators ask:
What resource was requested?
Was a file downloaded?
Which process initiated the request?
Did Defender later detect malware?
TLS Analysis
Encryption hides content, but not all metadata.
Investigators examine:
Server Name Indication (SNI)
Certificate details
JA3/JA4 fingerprints (if collected)
Session timing
Connection frequency
TLS metadata frequently identifies suspicious communication patterns.
Figure 7-16
Encrypted Communications
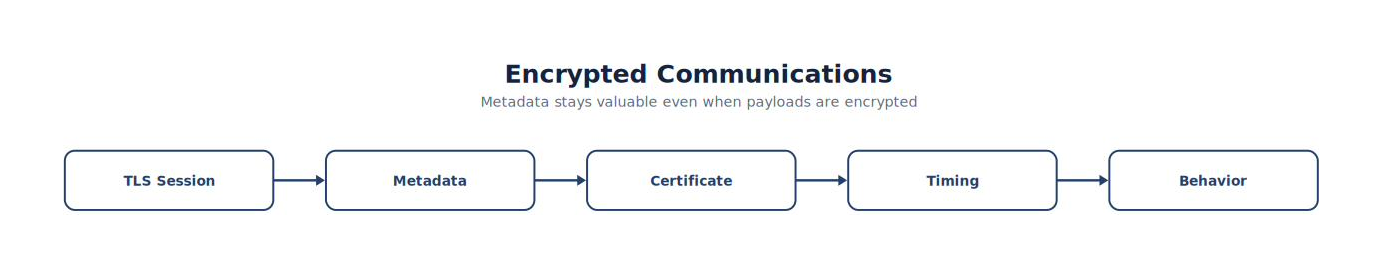
Note. The figure summarizes encrypted Communications and highlights the relationships among its principal elements, evidence sources, and analytical outcomes.
Metadata remains valuable even when payloads are encrypted.
Suricata Metadata
Suricata provides much more than alerts (Open Information Security Foundation, n.d.).
Examples include:
HTTP metadata
DNS metadata
TLS metadata
File information
Flow records
Alert details
These records frequently eliminate the need to inspect every packet.
Flow Analysis
Network flows summarize communications.
Example:
| Source | Destination | Bytes | Duration |
|---|---|---|---|
| WIN11 | External IP | 350 KB | 8 sec |
| WIN11 | DNS | 480 B | 20 ms |
| WIN11 | Server01 | 2 MB | 15 sec |
Flows identify communication patterns.
Packet Reconstruction
Sometimes investigators reconstruct conversations.
Questions include:
What file transferred?
What commands were issued?
What credentials crossed the network?
Was sensitive data transmitted?
Packet reconstruction provides detailed evidence.
Correlating Network and Endpoint Evidence
Professional DFIR investigations rarely stop with packets.
Example:
Sysmon:
PowerShell → DNS → Suricata:
HTTP Download → Packet Capture:
ZIP File → Windows Defender:
Malware → Wazuh:
Correlation Rule
The complete sequence tells the incident story.
Figure 7-17
Multi-Source Correlation
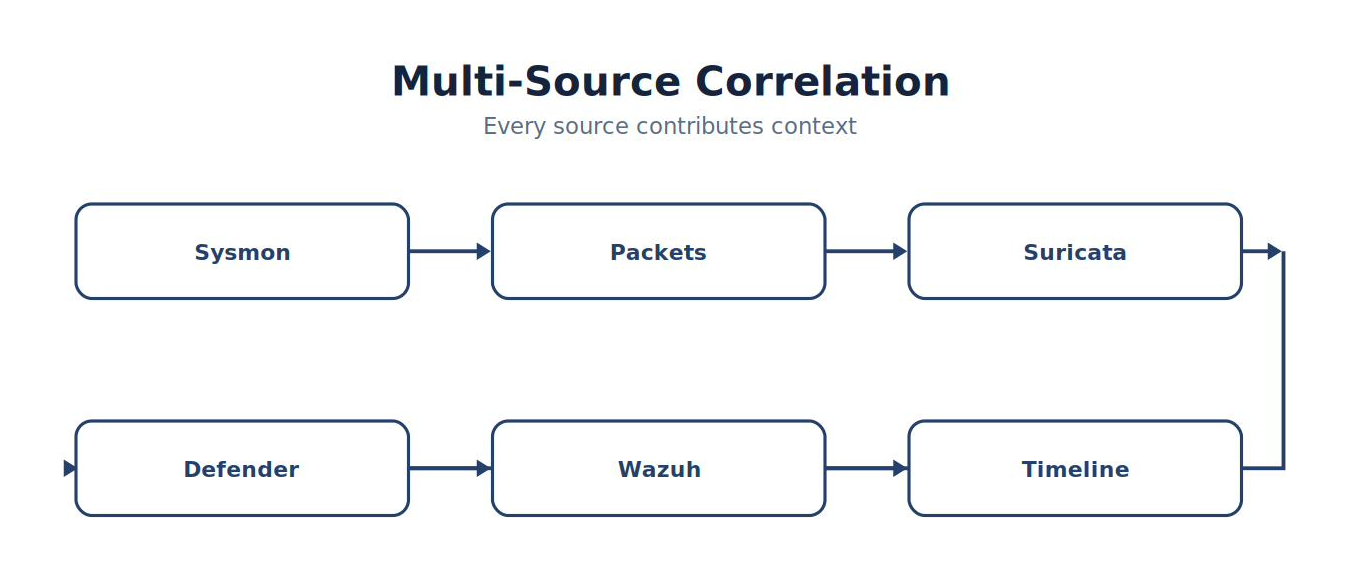
Note. The figure summarizes multi-Source Correlation and highlights the relationships among its principal elements, evidence sources, and analytical outcomes.
Every source contributes context.
Building a Network Timeline
Example:
| Time | Evidence |
|---|---|
| 10:01 | DNS Query |
| 10:02 | HTTP GET |
| 10:03 | Executable Download |
| 10:04 | TLS Session |
| 10:05 | PowerShell |
| 10:06 | Defender Alert |
| 10:07 | Wazuh Correlation |
Timelines reveal sequence.
Investigating Lateral Movement
Internal traffic deserves attention.
Questions include:
Which systems communicated unexpectedly?
Which administrative protocols were used?
Did one workstation contact many hosts?
Were credentials reused?
Lateral movement expands incident scope.
Investigating Exfiltration
Data leaving the network often generates observable patterns.
Indicators include:
Large outbound transfers.
Connections to unfamiliar cloud services.
Activity outside normal business hours.
Repeated uploads.
Network evidence frequently identifies exfiltration.
Packet Analysis Workflow
Professional investigators typically follow a structured workflow.
Figure 7-18
From Scope to Conclusion
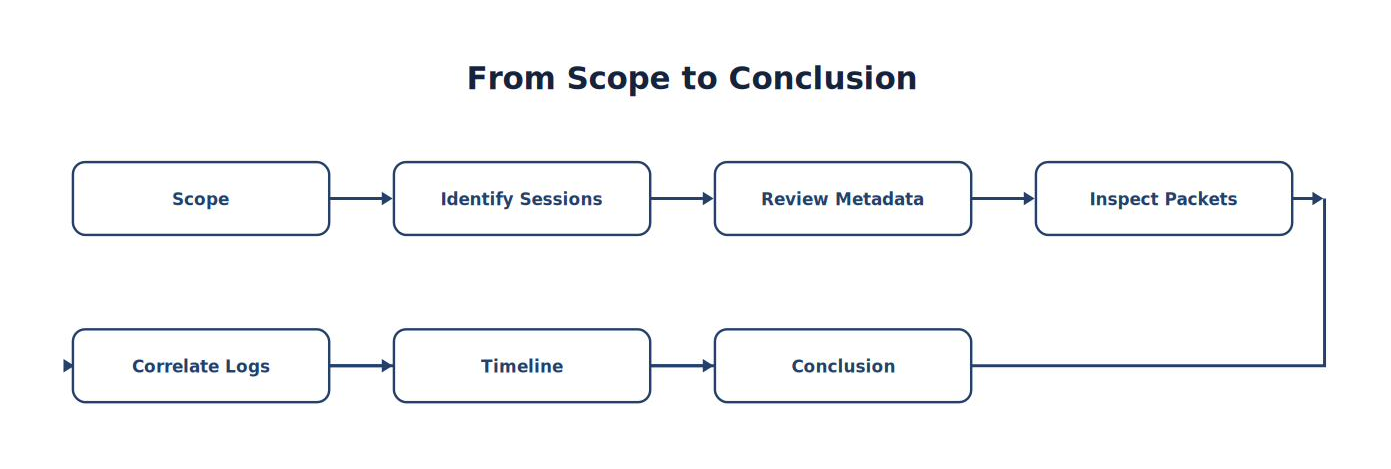
Note. The sequence traces how Scope progresses to Conclusion, emphasizing the intermediate evidence and processing steps.
Following a repeatable process reduces errors.
Common Student Mistake
Students often open a packet capture and begin scrolling through packets one by one.
Professional investigators begin with questions:
Which conversation matters?
Which protocol matters?
Which time period matters?
Which host matters?
Questions determine which packets deserve attention.
Chapter Exercise 7.5 — Network Forensics Investigation
Objective
Investigate a simulated malware download using packet captures and network telemetry.
Scenario
Evidence available:
PCAP file
Suricata eve.json
Wazuh alerts
Sysmon logs
Windows Defender detection
Student Tasks
Determine:
Initial DNS query.
Destination IP.
HTTP request.
Downloaded resource.
Associated process.
Timeline.
MITRE ATT&CK® techniques.
Detection improvements.
Students should correlate endpoint and network evidence before drawing conclusions.
Network Forensics Worksheet
| Artifact | Reviewed |
|---|---|
| PCAP | □ |
| DNS | □ |
| HTTP | □ |
| TLS | □ |
| Suricata | □ |
| Sysmon | □ |
| Defender | □ |
| Wazuh | □ |
| Timeline | □ |
Enterprise DFIR Workflow
A mature DFIR investigation integrates endpoint and network evidence into a unified process.
Figure 7-19
From Incident Report to Lessons Learned
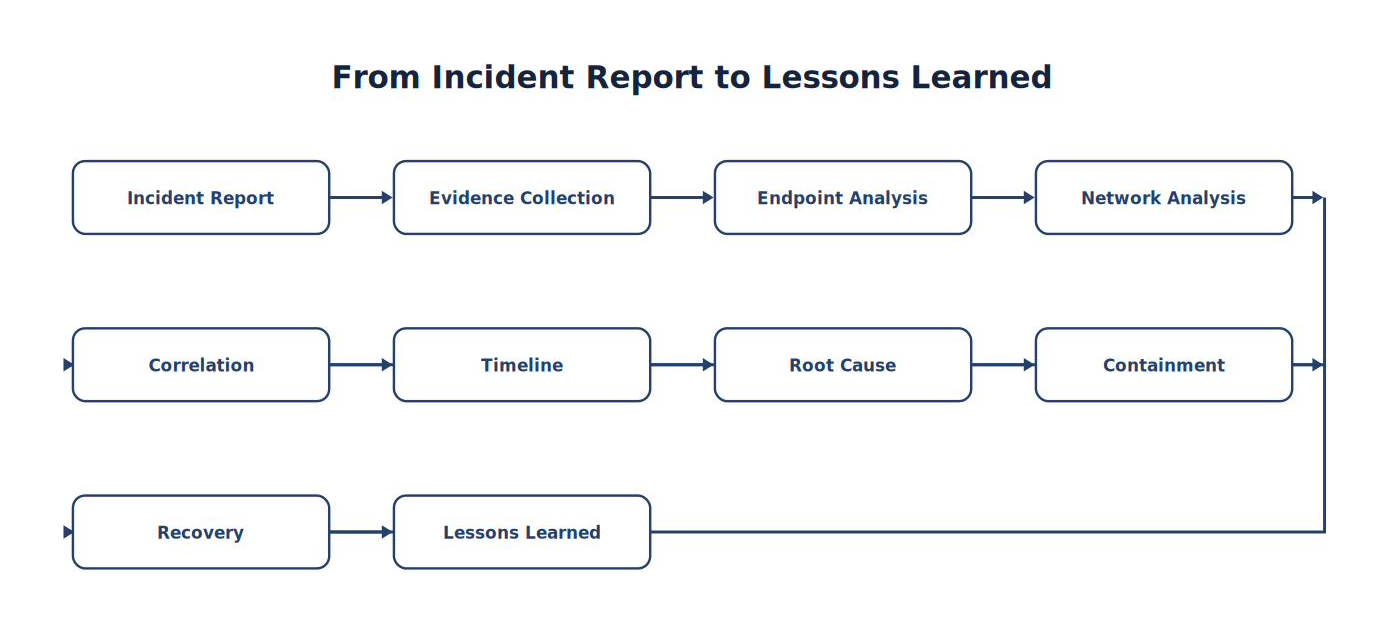
Note. The sequence traces how Incident Report progresses to Lessons Learned, emphasizing the intermediate evidence and processing steps.
This workflow should become the standard methodology for student investigations throughout the remainder of the textbook.
Think Like a Network Forensic Investigator
Imagine two investigators examine the same incident.
Investigator A
Reviews only endpoint logs. They determine malware executed.
Investigator B
Reviews endpoint logs, packet captures, DNS queries, Suricata metadata, TLS sessions, firewall logs, and Wazuh correlations.
They determine:
How the malware was delivered.
Which server hosted the payload.
Which systems communicated with the attacker.
Whether lateral movement occurred.
Whether data left the organization.
Which additional systems require investigation.
Both investigators found malware. Only one reconstructed the entire incident. That is the objective of network forensics.
Key Concepts
By the end of this chapter, you should understand that:
Network forensics reconstructs communications between systems using packet captures and network metadata.
Metadata often answers investigative questions more efficiently than full packet inspection.
DNS, HTTP, TLS, flow records, and packet captures each provide different layers of evidence.
Endpoint telemetry and network evidence should be correlated to produce accurate, evidence-based conclusions.
Timelines built from multiple sources provide a far more reliable understanding of an incident than any individual log or packet capture.
Looking Ahead
The next chapter, 7.6 Timeline Analysis and Incident Reconstruction, brings together every evidence source introduced in Part VI. Students will learn how to merge Sysmon events, Windows artifacts, Suricata alerts, packet captures, Wazuh detections, Windows Defender logs, and forensic artifacts into a single chronological narrative. Rather than examining isolated pieces of evidence, they will reconstruct complete attack chains, identify attacker decision points, determine root cause, and produce investigation reports suitable for technical teams, management, auditors, and legal stakeholders. This chapter represents one of the most important skills in enterprise DFIR: transforming thousands of individual events into a coherent, defensible explanation of what actually happened.
7.6 Timeline Analysis and Incident Reconstruction
Now they must answer the most important question in every investigation:
“What actually happened?” Individual logs don’t answer that question. Timelines do.
One of the themes throughout this chapter will be:
Events are observations. Timelines explain the incident. Professional investigators don’t simply list evidence—they build a defensible narrative supported by that evidence.
Chapter Overview
Modern investigations rarely fail because investigators lack evidence. They fail because investigators cannot organize the evidence.
A typical enterprise incident may include:
Millions of log entries
Thousands of network connections
Hundreds of Sysmon events
Multiple Wazuh alerts
Several Suricata detections
Browser artifacts
Registry changes
Scheduled tasks
Memory evidence
Individually, each artifact tells only a small part of the story. Timeline analysis combines them into a coherent reconstruction of attacker activity.
Learning Objectives
After completing this chapter, you should be able to:
Explain timeline analysis.
Correlate multiple evidence sources.
Identify attacker sequences.
Reconstruct incidents chronologically.
Differentiate causation from coincidence.
Develop evidence-supported conclusions.
Produce professional incident timelines.
Introduction
Suppose investigators discover:
A PowerShell process.
A DNS lookup.
A Suricata alert.
A Windows Defender detection.
Which happened first?
Without chronology, investigators cannot determine:
Initial compromise
Malware execution
Network communication
Persistence
Detection
Containment
Time provides meaning.
Figure 7-20
Timeline Reconstruction
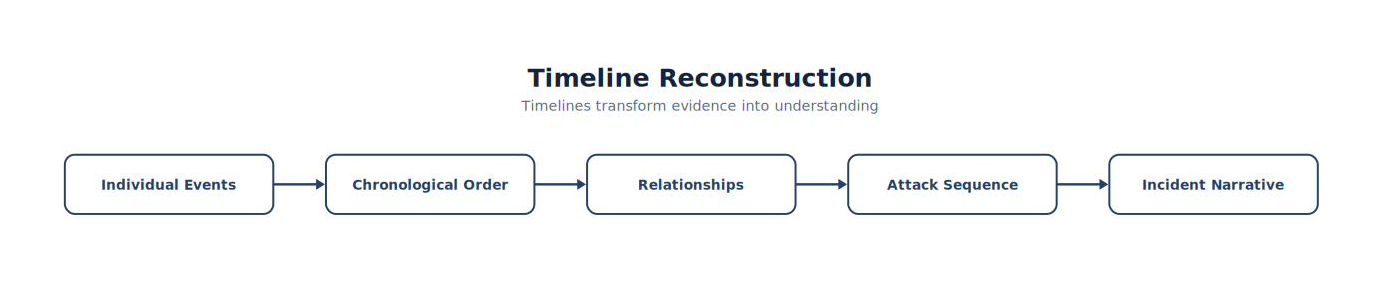
Note. The timeline places the events associated with timeline Reconstruction in chronological order to support reconstruction, correlation, and defensible conclusions.
Timelines transform evidence into understanding.
Why Timelines Matter
Imagine reading a mystery novel. Now imagine reading every page in random order. The information exists. The story disappears. Incident investigations behave the same way. Chronology provides context.
Analyst Tradecraft Tip
Investigators frequently ask:
“Which artifact is most important?”
The answer is usually:
The one that explains what happened next. Events gain significance through their relationships to other events.
Sources of Timeline Evidence
Professional timelines combine many evidence sources.
| Source | Timeline Contribution |
|---|---|
| Sysmon | Process creation, DNS, network |
| Windows Event Logs | Authentication, system activity |
| Wazuh | Correlated detections |
| Suricata | Network communications |
| Windows Defender | Malware detection |
| Registry | Persistence |
| Browser History | User activity |
| Prefetch | Program execution |
| Packet Capture | Network conversations |
| Memory | Live system activity |
No single source tells the complete story.
Building the Initial Timeline
Begin with high-confidence events.
Example:
| Time | Source | Event |
|---|---|---|
| 09:58 | Security Log | User Login |
| 10:01 | Word | Document Opened |
| 10:02 | Sysmon | PowerShell |
| 10:03 | Sysmon | DNS Query |
| 10:04 | Suricata | HTTP GET |
| 10:05 | Sysmon | File Created |
| 10:06 | Defender | Malware Quarantined |
| 10:07 | Wazuh | Correlation Alert |
The timeline immediately reveals the attack progression.
Identifying Relationships
Not every event belongs to the incident.
Investigators ask:
Did one event trigger another?
Was the timing reasonable?
Did the same process generate both events?
Did the same user perform the activity?
Did the same host participate?
Relationships create investigative confidence.
Figure 7-21
Event Correlation
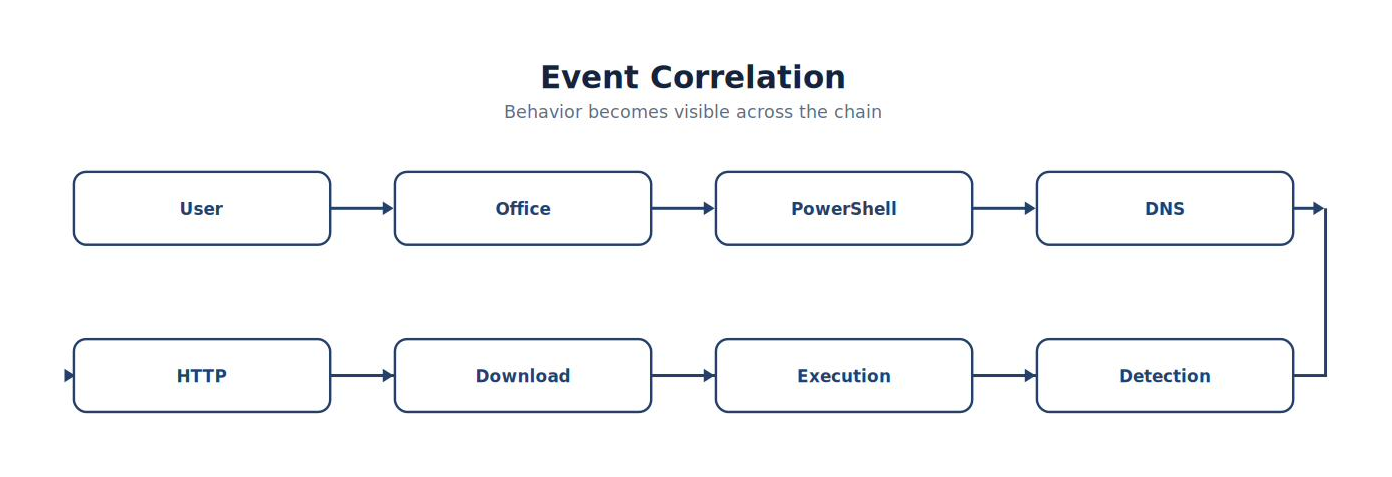
Note. The figure summarizes event Correlation and highlights the relationships among its principal elements, evidence sources, and analytical outcomes.
Cause Versus Coincidence
One of the greatest investigative challenges is avoiding false conclusions.
Example:
PowerShell executes.
Five minutes later:
A Defender alert appears.
Did PowerShell cause the alert?
Maybe. Maybe not. Investigators must establish relationships using multiple sources of evidence—not assumptions based solely on timing.
Time Synchronization
Timeline accuracy depends on synchronized clocks.
Investigators should verify:
Endpoint time
Server time
Firewall time
Wazuh Manager time
Suricata sensor time
Clock differences can significantly affect timeline interpretation.
Timeline Layers
Professional investigators often organize timelines into layers.
| Layer | Evidence |
|---|---|
| User Activity | Login, applications |
| Process Activity | Sysmon |
| Network Activity | Suricata |
| Security Controls | Defender, Wazuh |
| Persistence | Registry, Tasks |
Layering simplifies complex investigations.
Figure 7-22
Layered Timeline
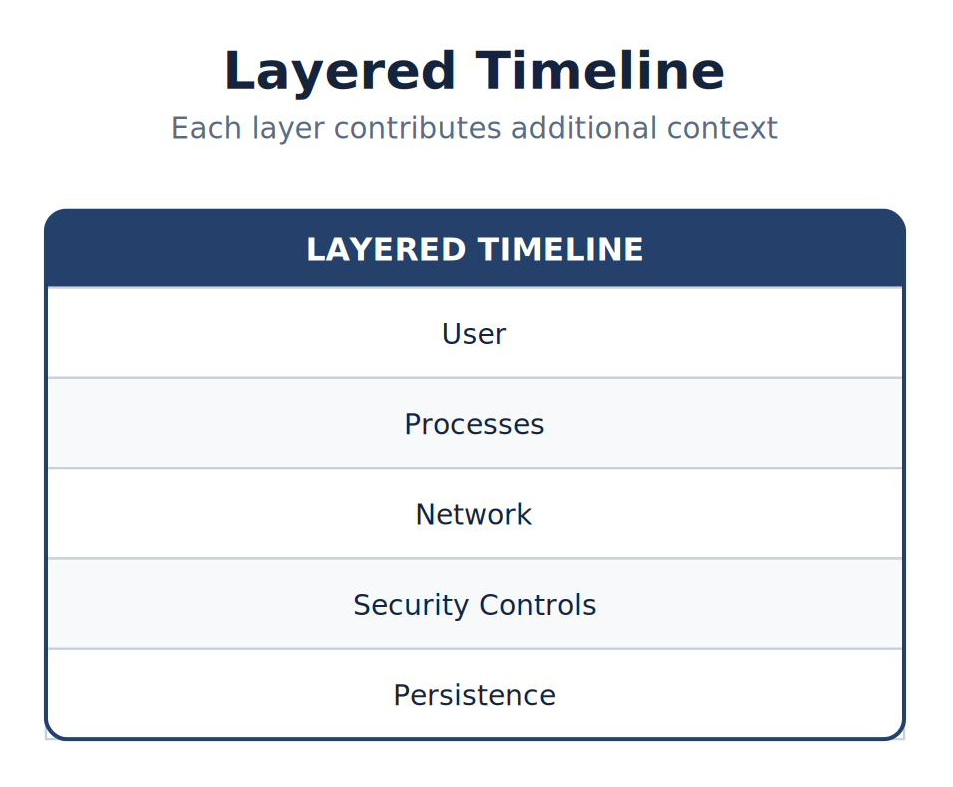
Note. The timeline places the events associated with layered Timeline in chronological order to support reconstruction, correlation, and defensible conclusions.
Each layer contributes additional context.
Root Cause Analysis
After constructing the timeline, investigators ask:
Where did the incident begin?
Examples:
Phishing email
Malicious attachment
Browser exploit
Credential compromise
Exposed service
The earliest reliable event often identifies root cause.
Identifying Decision Points
Attackers make decisions.
Questions include:
Why did they execute PowerShell?
Why did they contact this domain?
Why establish persistence?
Why move laterally?
Timelines help explain attacker objectives.
Timeline Validation
Professional investigators verify every conclusion.
Questions:
Which artifact supports this event?
Is another source available?
Does the timing make sense?
Is contradictory evidence present?
Validation strengthens credibility.
Visual Timelines
Many organizations present timelines graphically.
Example:
Figure 7-23
Investigation Timeline — Forensic Reconstruction
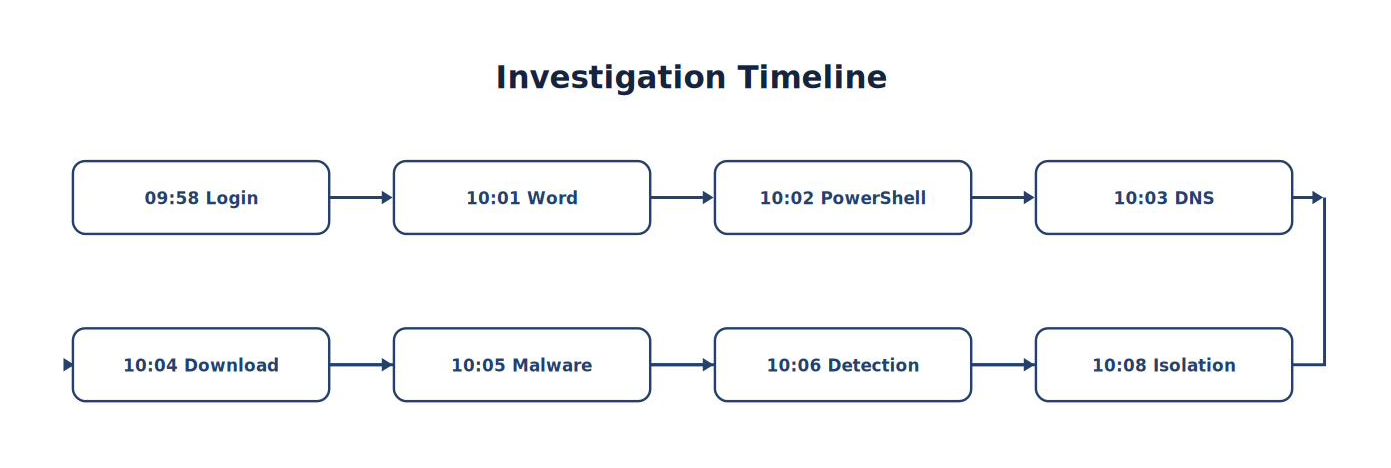
Note. The timeline places the events associated with investigation Timeline — Forensic Reconstruction in chronological order to support reconstruction, correlation, and defensible conclusions.
Visual timelines communicate incidents effectively to both technical and non-technical audiences.
Timeline Confidence
Not every event has equal certainty. Investigators should assign confidence levels.
| Confidence | Meaning |
|---|---|
| High | Confirmed by multiple independent sources |
| Medium | Supported by one reliable source |
| Low | Inferred, requires additional validation |
Documenting confidence improves transparency.
Incident Narrative
The timeline should support a written narrative.
Example:
At approximately 10:01, the user opened a Microsoft Word document. One minute later, Word launched PowerShell, which initiated a DNS query followed by an outbound HTTP request. The downloaded file was written to disk and immediately detected by Windows Defender. Wazuh correlated the endpoint and network telemetry, generating a high-severity alert that prompted incident response. Notice that every statement is supported by evidence.
Common Student Mistake
Students often produce timelines that simply list events.
Professional investigators explain:
Why the event matters.
What evidence supports it.
How it relates to previous events.
What occurred next.
A timeline should tell a story—not merely display timestamps.
Chapter Exercise 7.6 — Incident Reconstruction
Objective
Reconstruct a complete attack using evidence from multiple sources.
Evidence Available
Sysmon
Windows Event Logs
Wazuh alerts
Suricata eve.json
Windows Defender logs
Browser artifacts
Packet capture
Student Tasks
Build a unified timeline.
Identify the initial compromise.
Determine attacker actions.
Identify persistence.
Determine whether lateral movement occurred.
Recommend containment actions.
Write an incident narrative supported by evidence.
Timeline Reconstruction Worksheet
| Step | Completed |
|---|---|
| Events Collected | □ |
| Sources Correlated | □ |
| Timeline Ordered | □ |
| Root Cause Identified | □ |
| Confidence Assigned | □ |
| Narrative Written | □ |
| Recommendations Completed | □ |
Timeline Quality Checklist
Before finalizing an investigation, verify:
✓ Every event has a timestamp. ✓ Every conclusion cites supporting evidence. ✓ Contradictory evidence has been addressed. ✓ Timeline includes both endpoint and network activity. ✓ Incident narrative aligns with the timeline. ✓ Root cause is supported—not assumed. ✓ Recommendations are evidence-based.
Enterprise Incident Timeline Example
| Time | Evidence Source | Event | Confidence |
|---|---|---|---|
| 09:58:12 | Security Log | User authentication | High |
| 10:01:44 | Browser History | Document download | High |
| 10:02:09 | Sysmon ID 1 | WINWORD.EXE launches PowerShell | High |
| 10:02:15 | Sysmon ID 22 | DNS lookup | High |
| 10:02:18 | Suricata | HTTP GET request | High |
| 10:02:21 | Sysmon ID 11 | Executable created | High |
| 10:02:29 | Windows Defender | Threat quarantined | High |
| 10:02:35 | Wazuh | Correlated alert generated | High |
This format is appropriate for technical reports, incident reviews, and executive briefings.
Think Like a DFIR Investigator
Imagine two investigators receive identical evidence.
Investigator A
Creates a spreadsheet containing 5,000 events in chronological order.
Investigator B
Correlates endpoint logs, network metadata, Windows artifacts, memory findings, and Wazuh detections into a concise timeline. They identify the root cause, explain attacker actions, document confidence levels, distinguish confirmed facts from inferences, and produce an incident narrative that management, auditors, and technical staff can all understand. Both investigators organized the data. Only one reconstructed the incident. That is the objective of timeline analysis.
Key Concepts
By the end of this chapter, you should understand that:
Timeline analysis transforms isolated evidence into a coherent incident narrative.
Multiple independent evidence sources improve the accuracy and confidence of investigative conclusions.
Correlation requires more than matching timestamps; investigators must establish meaningful relationships between events.
Confidence levels, validation, and documentation strengthen the credibility of forensic findings.
Professional timelines support technical investigations, executive reporting, regulatory requirements, and continuous improvement of Detection Engineering and Incident Response processes.
Looking Ahead
The next chapter, 7.7 Incident Reporting and Executive Communication, teaches students how to communicate complex technical investigations to diverse audiences. Students will learn to prepare technical reports for responders, executive summaries for leadership, evidence packages for auditors, lessons-learned reports for engineering teams, and after-action reviews that drive continuous improvement. Because even the best forensic investigation has limited value if its findings cannot be communicated clearly, this chapter emphasizes one of the most important professional skills in DFIR: transforming technical evidence into actionable, defensible decisions.
7.7 Incident Reporting and Executive Communication
In reality, a DFIR investigator may spend 20–40% of an incident writing reports, preparing briefings, documenting evidence, and presenting findings.
One phrase I want students to remember throughout this chapter is:
An investigation is not complete until its findings are clearly communicated. Technical excellence has limited value if decision-makers cannot understand its implications.
Chapter Overview
At the conclusion of every investigation, someone asks:
“What happened?” Unfortunately, different audiences require different answers.
A SOC analyst wants:
Indicators of Compromise
Timelines
Detection details
An executive wants:
Business impact
Operational risk
Recovery status
Legal counsel wants:
Evidence
Documentation
Chain of custody
Regulators may want:
Notification timelines
Scope
Compliance information
Professional investigators tailor their communication to the audience.
Learning Objectives
After completing this chapter, you should be able to:
Explain the purpose of incident reporting.
Differentiate technical and executive reports.
Document evidence objectively.
Write evidence-supported conclusions.
Present technical findings to management.
Develop after-action reports.
Recommend improvements to security operations.
Introduction
Imagine you complete a week-long investigation.
You determine:
Initial compromise
Malware execution
Credential theft
Lateral movement
Data exfiltration
The evidence is excellent. Your documentation is poor. Management cannot understand the report. The board cannot determine business impact. Engineering cannot improve detections. The investigation technically succeeded. Operationally, it failed.
Figure 7-24
Investigation Lifecycle
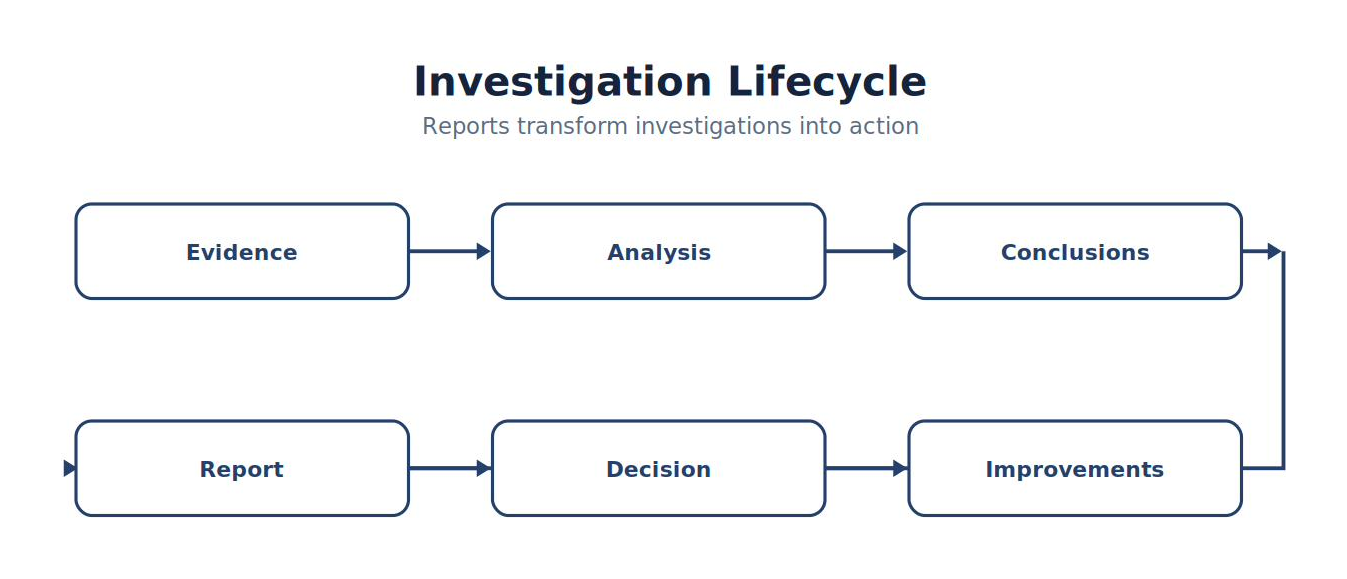
Note. The workflow presents the ordered stages of investigation Lifecycle and highlights the validation and feedback steps that make the process repeatable.
Reports transform investigations into action.
Why Reporting Matters
Incident reports support:
Technical remediation
Executive decisions
Regulatory compliance
Legal proceedings
Insurance claims
Lessons learned
Future detection engineering
Documentation preserves organizational knowledge.
Analyst Tradecraft Tip
Good investigators collect evidence. Excellent investigators communicate evidence. Communication often determines whether an investigation creates lasting organizational improvements.
Principles of Professional Reporting
Incident reports should be:
Accurate
Objective
Clear
Concise
Evidence-based
Repeatable
Actionable
Avoid speculation.
Differentiate:
Confirmed facts from
Reasonable inferences from
Unknown information.
Report Audiences
Professional investigators write for multiple audiences.
| Audience | Primary Interest |
|---|---|
| SOC Analysts | Technical evidence |
| Incident Responders | Recovery actions |
| Detection Engineers | Detection improvements |
| Executives | Business impact |
| Legal | Documentation |
| Compliance | Regulatory obligations |
| Auditors | Process verification |
One report rarely satisfies every audience.
Technical Investigation Report
Technical reports typically include:
Executive Summary
Scope
Evidence Collected
Timeline
Findings
ATT&CK Mapping
Indicators of Compromise
Root Cause
Recommendations
Technical detail supports future investigations.
Executive Summary
Executives require concise information.
Example:
On July 14, 2026, Falcon Manufacturing detected malicious PowerShell activity on a Windows 11 workstation. Investigation determined that a phishing email initiated the attack, resulting in a malware download and attempted credential theft. Windows Defender quarantined the malware before lateral movement was observed. No evidence of successful data exfiltration was identified. The investigation recommends improvements to email filtering, PowerShell monitoring, and ATT&CK coverage for credential access techniques.
Notice:
No registry paths. No packet captures. No Event IDs. Executives need decisions, not raw telemetry.
Technical Findings
Every finding should include:
Evidence
Source
Timestamp
Confidence
Supporting artifacts
Example:
| Finding | Evidence |
|---|---|
| PowerShell Execution | Sysmon Event ID 1 |
| DNS Query | Sysmon Event ID 22 |
| HTTP Download | Suricata |
| Malware | Windows Defender |
| Correlation | Wazuh |
Every conclusion cites evidence.
Indicators of Compromise (IOCs)
Reports should document observed IOCs.
Examples include:
IP addresses
Domains
URLs
File hashes
Filenames
Registry paths
Scheduled task names
Process names
IOCs support future detection and response activities.
Root Cause
Every report should answer:
How did the incident begin?
Examples:
Phishing email
Weak password
Exploited vulnerability
Misconfiguration
Stolen credentials
Root cause guides remediation.
Figure 7-25
Root Cause Analysis
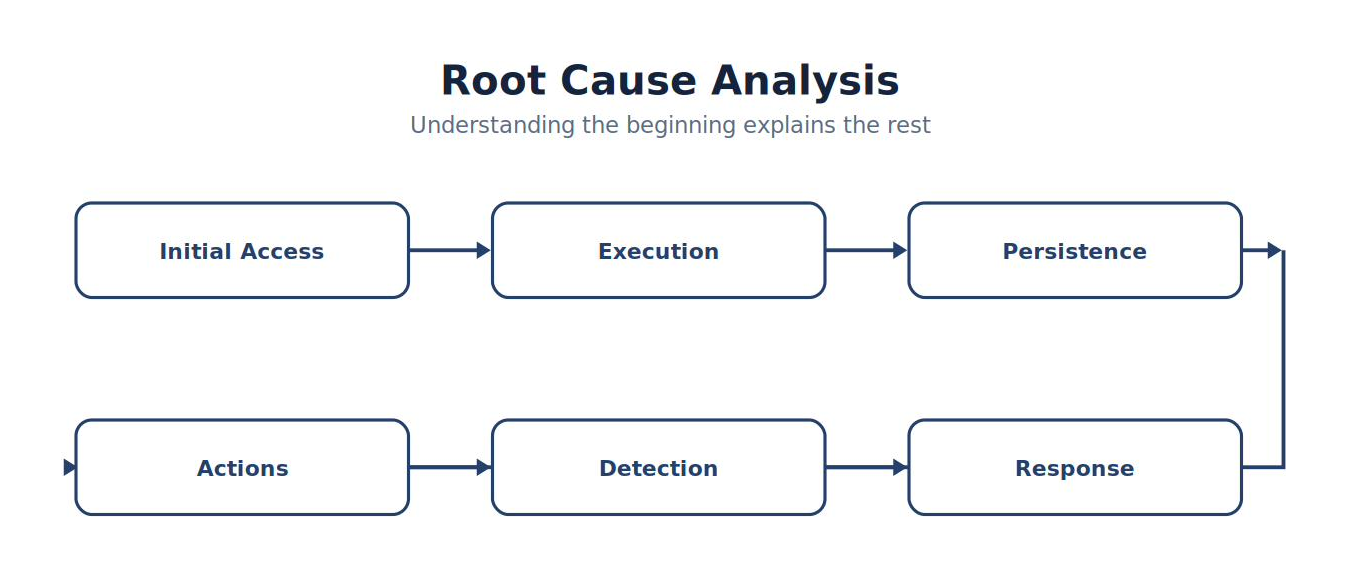
Note. The figure summarizes root Cause Analysis and highlights the relationships among its principal elements, evidence sources, and analytical outcomes.
Understanding the beginning explains the remainder of the incident.
Business Impact
Technical findings must be translated into organizational impact.
Questions include:
Which systems were affected?
Which business functions were interrupted?
Was sensitive information exposed?
Were customers affected?
Were regulatory obligations triggered?
Executives make business decisions, not packet-level decisions.
Recommendations
Every recommendation should be:
Specific
Evidence-based
Actionable
Prioritized
Example:
| Priority | Recommendation |
|---|---|
| High | Expand Sysmon configuration |
| High | Create Wazuh correlation rule |
| Medium | Tune Suricata signatures |
| Medium | Conduct phishing awareness training |
| Low | Improve hunting playbook documentation |
Recommendations should clearly reduce future risk.
Confidence Statements
Professional reports distinguish certainty.
Example:
| Confidence | Meaning |
|---|---|
| High | Confirmed by multiple evidence sources |
| Medium | Strong supporting evidence |
| Low | Limited evidence; additional investigation recommended |
Transparency improves credibility.
Writing Clearly
Avoid jargon when unnecessary.
Instead of:
“Observed T1059.001 followed by T1105.”
Write:
“PowerShell executed and subsequently downloaded an executable from an external server.” Technical details can appear in appendices. The main report should remain understandable.
Common Reporting Mistakes
Avoid:
❌ Speculation
❌ Unsupported conclusions
❌ Missing timestamps
❌ Missing evidence references
❌ Overly technical executive summaries
❌ Recommendations without justification
Professional reports separate facts from assumptions.
Lessons Learned
Every incident should conclude with organizational learning.
Examples:
Detection improvements
Playbook updates
Training needs
Configuration changes
Policy improvements
Communication improvements
Lessons learned prevent recurrence.
After-Action Review
Conduct a structured review after incident closure.
Suggested questions:
What went well?
What delayed the response?
Which detections failed?
Which telemetry was missing?
Which communications were effective?
Which procedures require revision?
Continuous improvement is the objective.
Figure 7-26
Continuous Improvement
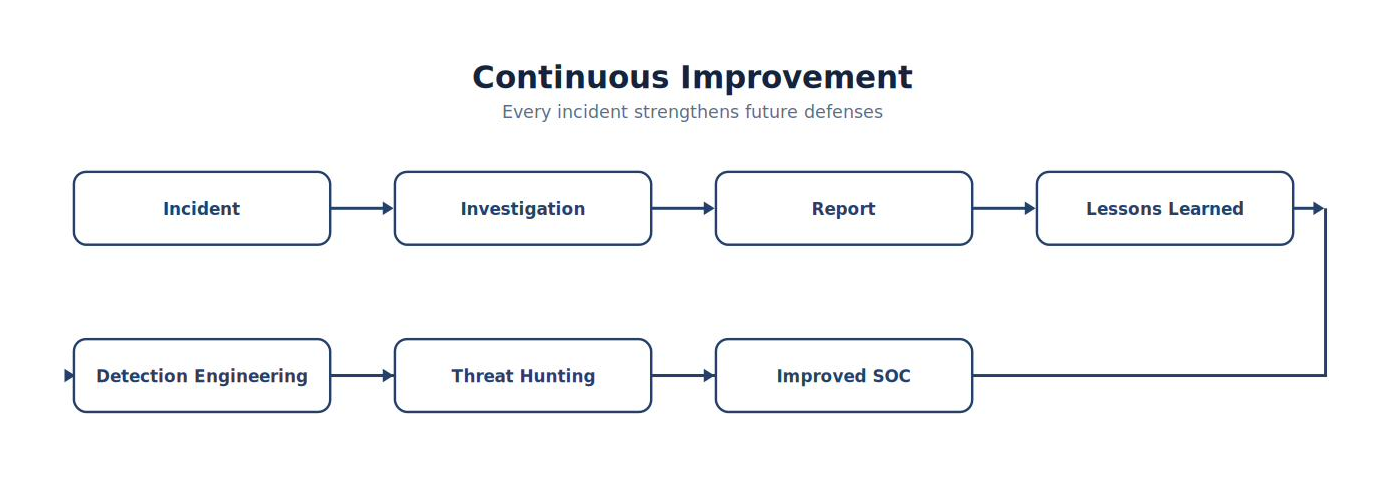
Note. The figure summarizes continuous Improvement and highlights the relationships among its principal elements, evidence sources, and analytical outcomes.
Every incident strengthens future defenses.
Chapter Exercise 7.7 — Professional Incident Report
Objective
Prepare both technical and executive reports for the simulated malware investigation completed in previous chapters.
Student Tasks
Develop:
Technical Report
Include:
Timeline
Evidence
ATT&CK Mapping
Root Cause
IOCs
Recommendations
Executive Summary
Limit:
Two pages.
Focus on:
Business impact
Risk
Recovery
Recommendations
Students should tailor the content appropriately for each audience.
Incident Report Template
Executive Summary
Scope
Systems Affected
Timeline
Evidence
Findings
ATT&CK Mapping
Indicators of Compromise
Root Cause
Recommendations
Lessons Learned
Report Quality Checklist
Before submitting an incident report, verify:
✓ Every conclusion cites supporting evidence. ✓ Timelines are complete and chronologically accurate. ✓ Confidence levels are identified where appropriate. ✓ Executive summary is understandable to non-technical readers. ✓ Technical findings contain sufficient detail for responders. ✓ Recommendations are prioritized and actionable. ✓ Lessons learned identify opportunities for improving security operations.
Think Like a DFIR Professional
Imagine two investigators complete the same incident.
Investigator A
Produces a 150-page report filled with screenshots, registry keys, packet captures, and log entries.
Management cannot determine:
What happened.
Business impact.
Required decisions.
Investigator B
Produces:
A concise executive summary.
A detailed technical appendix.
A validated timeline.
Clearly documented evidence.
ATT&CK mappings.
Root cause analysis.
Prioritized recommendations.
An after-action improvement plan.
Both investigations uncovered the same facts. Only one enabled the organization to make informed decisions, improve its defenses, and communicate confidently with stakeholders. That is the purpose of professional incident reporting.
Key Concepts
By the end of this chapter, you should understand that:
Incident reporting transforms technical investigations into actionable organizational knowledge.
Different audiences require different levels of technical detail.
Every finding should be supported by verifiable evidence and clearly distinguished from inference.
Executive communication should focus on business impact, risk, recovery, and decision support.
After-action reviews and lessons learned connect DFIR back to Detection Engineering, Threat Hunting, and continuous improvement.
Effective communication is a core competency of modern DFIR practitioners.
Looking Ahead
The final chapter of Part VI, 7.8 Digital Forensics and Incident Response Capstone, serves as the culmination of the DFIR portion of the textbook. Students will respond to a realistic enterprise cyber incident from initial detection through evidence preservation, forensic analysis, timeline reconstruction, incident reporting, executive briefing, and post-incident improvement planning. The capstone integrates Wazuh, Sysmon, Suricata, Windows Defender, packet captures, Windows forensic artifacts, MITRE ATT&CK, and structured incident response into a single end-to-end investigation that mirrors the workflow of professional DFIR teams in enterprise environments. By the conclusion of the capstone, students will have demonstrated the complete investigative lifecycle expected of an entry-level Digital Forensics and Incident Response analyst.
7.8 Digital Forensics and Incident Response Capstone
Students should experience the complete lifecycle:
Figure 7-27
From Detect to Improve
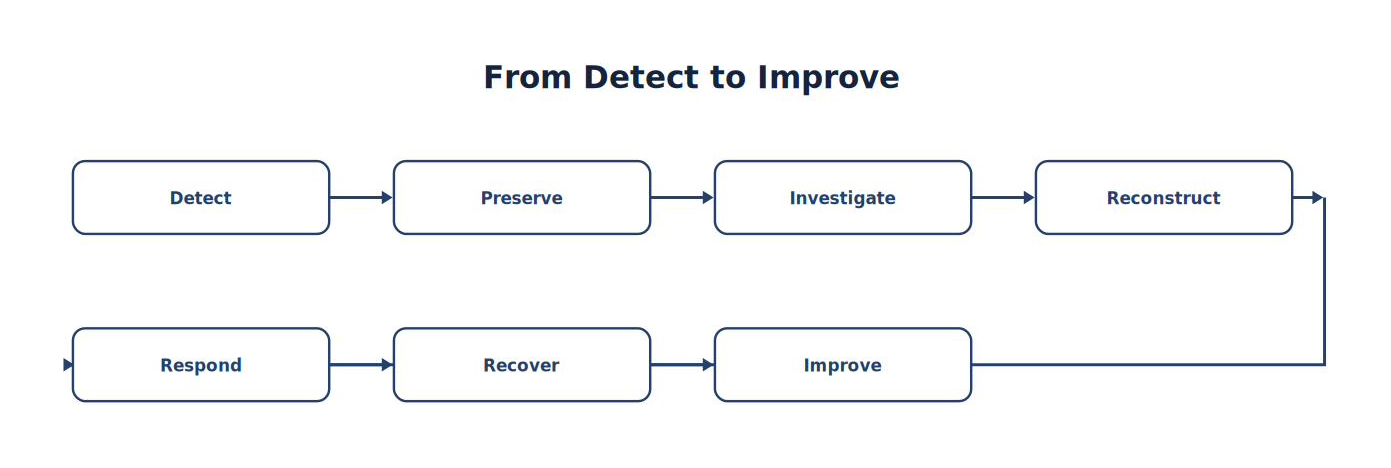
Note. The sequence traces how Detect progresses to Improve, emphasizing the intermediate evidence and processing steps.
This capstone also completes the progression that began in Chapter 1. Students started as SOC analysts. They became Detection Engineers. Then Threat Hunters. Now they operate as Digital Forensic and Incident Response investigators.
Scenario
Congratulations. You have recently joined the Digital Forensics and Incident Response (DFIR) Team at Falcon Manufacturing, an international manufacturing company with approximately 8,000 employees operating in North America, Europe, and Asia.
The organization maintains:
Windows 11 endpoints
Ubuntu Linux servers
Active Directory
Wazuh SIEM
Sysmon
Suricata
Windows Defender
VMware infrastructure
Centralized logging
Enterprise backup systems
At approximately 09:42 Monday morning, the SOC receives multiple alerts involving a workstation used by a financial analyst.
Within minutes the SOC observes:
Encoded PowerShell execution
DNS lookups to previously unseen domains
HTTP downloads
Windows Defender malware detection
Wazuh Level 12 correlation alerts
Unusual outbound HTTPS traffic
Management authorizes a full DFIR investigation. Your team has been assigned lead responsibility.
Mission Objectives
Determine:
What happened?
When did it begin?
How did it occur?
Which systems were affected?
Was persistence established?
Was data stolen?
How should the organization recover?
How can future incidents be prevented?
Every conclusion must be supported by evidence.
Phase 1 — Initial Response
Students receive:
SOC Alert
Wazuh Dashboard
Initial Suricata Alerts
Windows Defender Detection
Tasks:
Determine:
Is this an actual incident?
What is the severity?
Which systems require immediate attention?
Deliverable
Initial Incident Assessment
Phase 2 — Evidence Preservation
Students identify:
Figure 7-28
From Volatile Evidence to Chain of Custody
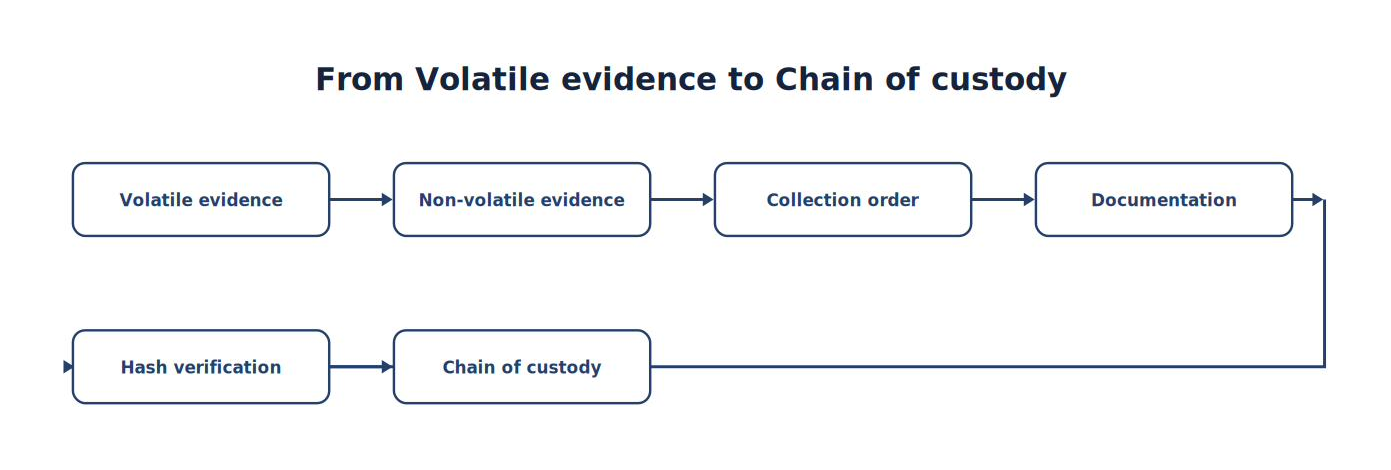
Note. The sequence traces how Volatile Evidence progresses to Chain of Custody, emphasizing the intermediate evidence and processing steps.
Deliverable
Evidence Preservation Plan
Phase 3 — Endpoint Investigation
Students analyze:
Sysmon
Windows Event Logs
Registry
Prefetch
UserAssist
Jump Lists
Scheduled Tasks
Browser Artifacts
Questions:
- What executed?
- Who executed it?
- When?
Deliverable
Endpoint Investigation Report
Phase 4 — Network Investigation
Students analyze:
Suricata
Packet Capture
DNS
HTTP
TLS
Firewall Logs
Determine:
Initial communication
Malware download
External communications
Potential Command-and-Control
Possible exfiltration
Deliverable
Network Investigation Report
Phase 5 — Timeline Reconstruction
Students combine:
Figure 7-29
From Sysmon to Timeline
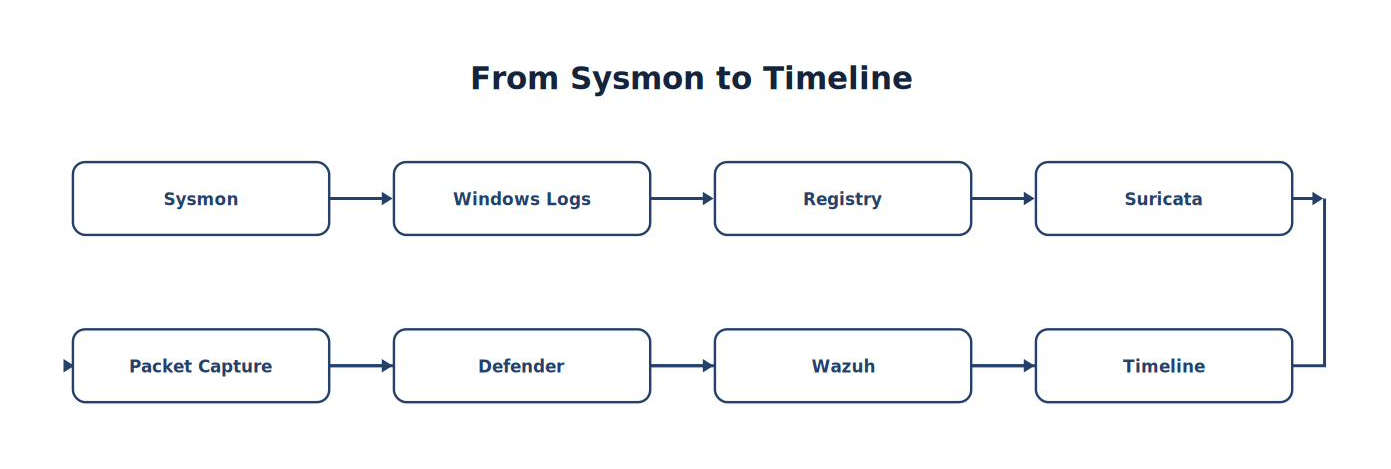
Note. The sequence traces how Sysmon progresses to Timeline, emphasizing the intermediate evidence and processing steps.
Figure 7-30
Enterprise Investigation
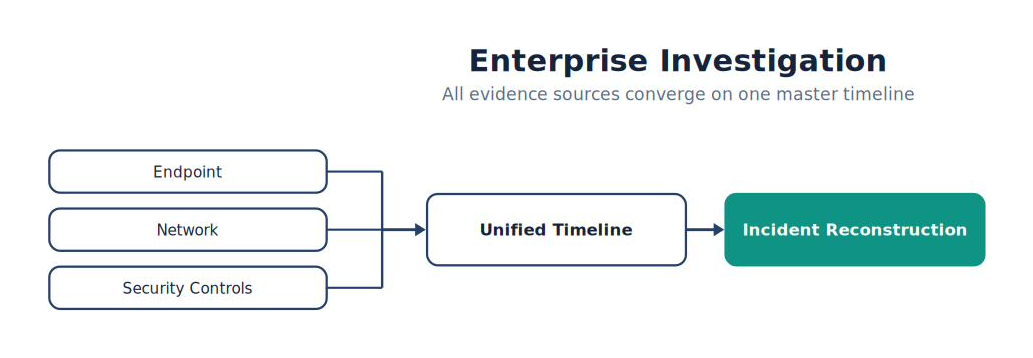
Note. The figure summarizes enterprise Investigation and highlights the relationships among its principal elements, evidence sources, and analytical outcomes.
Deliverable
Master Investigation Timeline
Phase 6 — ATT&CK Mapping
Students identify:
Initial Access
Execution
Persistence
Discovery
Credential Access
Command and Control
Exfiltration
Impact
Every observed activity should be mapped to the most appropriate ATT&CK tactic and technique, with supporting evidence documented.
Deliverable
ATT&CK Coverage Matrix
Phase 7 — Root Cause Analysis
Determine:
How did the attack begin?
Possible examples:
Phishing email
Malicious attachment
Drive-by download
Credential compromise
VPN vulnerability
Students must support their conclusion using multiple independent evidence sources.
Deliverable
Root Cause Analysis
Phase 8 — Incident Response
Develop:
Figure 7-31
From Containment to Lessons Learned
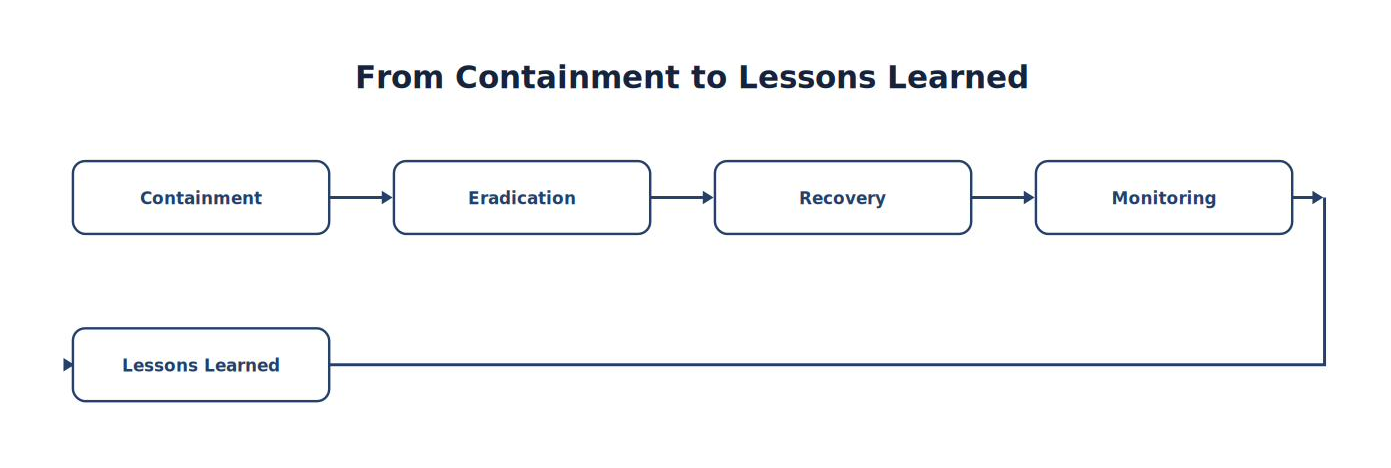
Note. The sequence traces how Containment progresses to Lessons Learned, emphasizing the intermediate evidence and processing steps.
Students should explain why each action was selected and identify any operational trade-offs.
Deliverable
Incident Response Plan
Phase 9 — Detection Engineering Improvements
Based on findings, students improve:
Wazuh Rules
Suricata Signatures
Sysmon Configuration
Hunting Playbooks
ATT&CK Coverage
SOC Dashboards
Every recommendation must directly address a gap identified during the investigation.
Deliverable
Engineering Improvement Plan
Phase 10 — Executive Briefing
Students present findings to executive leadership.
Presentation should answer:
What happened?
Business impact?
Was sensitive information exposed?
Was the incident contained?
What remains unknown?
What improvements are recommended?
Estimated organizational risk?
Executives should understand the conclusions without reviewing raw technical evidence.
Deliverable
Executive Presentation
Required Deliverables
| Deliverable | Required |
|---|---|
| Initial Assessment | ✓ |
| Evidence Collection Plan | ✓ |
| Chain of Custody | ✓ |
| Endpoint Investigation | ✓ |
| Network Investigation | ✓ |
| Timeline | ✓ |
| ATT&CK Mapping | ✓ |
| Root Cause Analysis | ✓ |
| Incident Response Plan | ✓ |
| Engineering Recommendations | ✓ |
| Technical Report | ✓ |
| Executive Summary | ✓ |
Technical Validation Checklist
Students should verify:
✓ Sysmon Event ID 1
✓ Sysmon Event ID 3
✓ Sysmon Event ID 11
✓ Sysmon Event ID 22
✓ Suricata Alerts
✓ Suricata Metadata
✓ Windows Defender
✓ Wazuh Correlation
✓ Timeline Validation
✓ ATT&CK Mapping
✓ Root Cause
Peer Review
Each investigation receives:
Technical Review
Documentation Review
Timeline Review
Evidence Review
Executive Presentation Review
Projects should be revised after peer feedback before final submission.
Grading Rubric
| Category | Points |
|---|---|
| Initial Assessment | 5 |
| Evidence Preservation | 10 |
| Endpoint Investigation | 15 |
| Network Investigation | 15 |
| Timeline Reconstruction | 15 |
| ATT&CK Mapping | 10 |
| Root Cause Analysis | 10 |
| Incident Response Plan | 10 |
| Executive Presentation | 5 |
| Professional Documentation | 5 |
| Total | 100 |
Student Reflection
Each student submits a professional reflection addressing:
Which evidence source contributed the most to your investigation, and why?
Which evidence source was the most difficult to interpret?
How did correlating endpoint and network telemetry improve your confidence?
Which ATT&CK techniques were easiest to identify? Which were most difficult?
Which Detection Engineering improvements would you implement immediately?
How would you modify the Incident Response playbook based on this case?
If you repeated the investigation, what would you do differently?
Part VI Summary
By completing Part VI, you have developed the core competencies expected of an entry-level Digital Forensics and Incident Response analyst.
You can now:
Preserve digital evidence using sound forensic principles.
Differentiate volatile and non-volatile evidence.
Conduct live response activities.
Investigate Windows forensic artifacts.
Analyze network evidence using Suricata and packet captures.
Correlate endpoint, network, and security telemetry.
Reconstruct incidents using evidence-based timelines.
Perform structured root cause analysis.
Develop containment, eradication, and recovery plans.
Produce professional technical reports and executive briefings.
Most importantly, you have learned to support every investigative conclusion with verifiable evidence rather than assumptions.
Complete Book Progress Summary
At this point, the reader has progressed through a realistic enterprise SOC career path:
| Part | Student Role |
|---|---|
| Part I | Security Fundamentals |
| Part II | Wazuh Administrator |
| Part III | SOC Analyst |
| Part IV | Detection Engineer |
| Part V | Threat Hunter / Purple Team Engineer |
| Part VI | Digital Forensics & Incident Response Analyst |
This progression intentionally mirrors how cybersecurity professionals grow within enterprise Security Operations Centers.
Part VII Preview — Security Operations Automation, SOAR, and Artificial Intelligence
The final part of the textbook looks toward the future of SOC operations. Students will learn how modern security teams reduce analyst workload through automation, orchestrate investigations using Security Orchestration, Automation, and Response (SOAR) platforms, enrich alerts with threat intelligence, automate repetitive workflows, integrate Wazuh with external tools, and apply artificial intelligence responsibly to detection engineering, threat hunting, and incident response. Rather than replacing analysts, automation and AI amplify their effectiveness by handling repetitive tasks, surfacing relevant context, and accelerating evidence collection while leaving critical judgment, validation, and decision-making to human defenders (Gartner, n.d.-a).
7.9 Chapter Summary
This chapter shifted your focus from detecting and hunting threats to responding to confirmed incidents. You learned the difference between the mindset of a threat hunter (“Is an attacker here?”) and an incident responder (“What happened, what is still happening, and what must we do next?”). You learned to preserve evidence properly — including the Order of Volatility, which governs the sequence in which evidence should be collected before it disappears — and to maintain a defensible chain of custody throughout an investigation.
You explored Windows forensic artifacts (event logs, the Registry, Prefetch, Jump Lists, scheduled tasks), learned when and how to acquire volatile memory using tools like WinPmem, and practiced reconstructing attacker activity from network evidence including packet captures and Suricata metadata. You learned to merge all of these sources into a single defensible timeline, and — just as importantly — how to communicate the results of a technical investigation to audiences ranging from fellow analysts to executive leadership.
DFIR is where every other skill in this textbook converges: the telemetry validation discipline from Chapter 1, the correlation and investigation methodology from Chapter 4, the detection engineering from Chapter 5, and the threat hunting and adversary emulation from Chapter 6 all become tools in service of answering one question — what actually happened, and what do we do about it?
Chapter 7 Key Terms
| Term | Definition |
|---|---|
| AFF4 | An open forensic container format that bundles an evidence image together with acquisition metadata. |
| Chain of Custody | Documentation recording who collected evidence, when, where it was stored, and who accessed it. |
| Live Response | Collecting evidence from an actively running system rather than an imaged, powered-off system. |
| Order of Volatility | The principle that evidence should be collected in order from most volatile (e.g., RAM) to least volatile (e.g., archived logs) to minimize loss. |
| Volatile Evidence | Evidence that exists only while a system remains powered on, such as running processes or memory contents. |
| WinPmem | A free, open-source Windows memory acquisition tool maintained by Velocidex. |
Knowledge Check
Select the best answer for each question.
1. What is the key difference in mindset between threat hunting and incident response?
A. Threat hunting asks “Is an attacker here?”; incident response asks “What happened, and what must we do?”
B. They are identical disciplines
C. Incident response never uses telemetry
D. Threat hunting only occurs after an incident is confirmed
2. What does the Order of Volatility describe?
A. The order in which alerts should be investigated
B. The severity ranking of Wazuh rules
C. The sequence for collecting evidence, from most volatile (e.g., memory) to least volatile (e.g., archived logs)
D. The order Suricata rules are loaded
3. Why is a chain of custody important during an investigation?
A. It is only relevant for law enforcement
B. It documents who handled evidence and when, preserving its integrity and credibility
C. It replaces the need for cryptographic hashes
D. It has no practical value in enterprise incident response
4. Why should you compute a cryptographic hash of a memory image immediately after acquisition?
A. To compress the file
B. Hashing is only required for disk images, not memory
C. It speeds up the acquisition process
D. To create a verifiable record that proves the evidence has not been altered
5. Why should a memory image never be written to the same disk being investigated?
A. It has no effect on the investigation
B. It is required by WinPmem’s licensing
C. It risks overwriting other volatile or slack-space evidence not yet examined
D. It makes the AFF4 format invalid
6. What is “live response” in DFIR?
A. Collecting evidence from an actively running system
B. Restoring a system from backup
C. Writing a post-incident report
D. Updating Suricata rules after an incident
7. Why does effective incident reporting matter as much as the technical investigation itself?
A. It doesn’t — only the technical findings matter
B. Reports are only required for legal proceedings
C. Executive summaries replace the need for technical accuracy
D. Findings that cannot be clearly communicated to stakeholders have limited practical value
Chapter Discussion Questions
Explain why an incident responder’s priorities shift once an alert is confirmed as a genuine incident.
Walk through the Order of Volatility and explain why RAM is collected before disk images.
Why does documentation itself count as evidence during a DFIR investigation?
Describe a scenario where memory acquisition would reveal evidence that disk forensics alone would miss.
Why is it important to integrate endpoint artifacts, memory evidence, and network evidence into a single timeline rather than analyzing each in isolation?
How would you adapt a technical incident report for an executive audience versus a peer SOC analyst?
Further Resources
NIST SP 800-61r3 — Incident Response Recommendations (https://csrc.nist.gov/pubs/sp/800/61/r3/final) — Current federal incident response guidance.
NIST SP 800-86 — Forensic Techniques in Incident Response (https://csrc.nist.gov/pubs/sp/800/86/final) — Evidence acquisition and handling in depth.
Rich, M. S. (2026). Advanced network forensics: A cyber-behavioral science approach. John Wiley & Sons. — Secondary reading on network-evidence provenance, packet analysis, and behavioral context.
SANS — The Incident Handlers Handbook (Kral, 2011) (https://www.sans.org/white-papers/33901/) — Source of the six-phase lifecycle taught in this chapter.
WinPmem (https://github.com/Velocidex/WinPmem) — The memory acquisition tool used in the lab.
Volatility Foundation (https://volatilityfoundation.org/) — Memory analysis framework for examining acquired images.